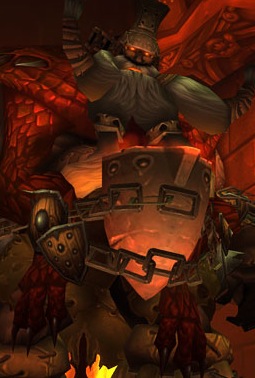
 If you've been pulled into an Ulduar group, but you haven't had the time to watch the vids or read the blogs, here's a quick reference guide on what you *should* know about the Hodir fight. Good luck!
Hodir:
Note: In your video settings TURN ON PROJECTED TEXTURES!
The Fight:
Where to stand - Keep moving! You have to keep moving in this fight to avoid the stackable debuff, so stay in range of your tank but don't stand still for too long. {There are two occasions where you CAN stand still that I will discuss below}
What to watch for -
1. Frost Nova! - When Hodir begins to cast this, two large runes will appear on the ground. DO NOT stand in them but DO stand near them. Two snow drifts will fall from the ceiling filling these runes. Immediately after this happens run on to one of the piles. If you're left standing on the floor when Frost Nova finishes being cast, you will be ice blocked like the other NPCs in the room.
Note: While you're standing on a pile of snow you DO NOT have to keep moving. Use this to your advantage until the snow pile disappears and you fall back to the floor.
2. Frozen Blows! - Much like Deconstructor's Tantrum, Frozen Blows hit the entire raid for a huge amount of damage over time. Pre HoT as many people as you can while you can and use wild growth generously.
2. Biting Cold! - As I mentioned above, you cannot stand still for too long or you will start to gain a stackable debuff (much like the last boss in The Nexus). If you do get the debuff, you will have to keep moving 1 second for each stack you have before it disappears. And yes, it does hit very hard.
3. Icicles! - Small runes will appear on the floor throughout this fight indicating where icicles are going to fall. Do not stand in them or run through them. If you're hit with an icicle, you WILL feel it.
4. Frost traps. - Occasionally people will be frost trapped in place. This can be dangerous due to falling icicles and the Biting Cold debuff. Pay a little extra attention to the toons standing in traps and if you're the one trapped just shapeshift out of it.
5. Buffs. - The NPCs ice blocked in the room will help your raid once you free them. Use them to your advantage.
- Toasty Fire = Prevents the Biting Cold debuff. If you're standing near the fire you can cast without having to move.
- Starlight = 100% haste buff. If one of these is near a toasty fire, you're in business. If it isn't, however, try jumping up and down between casts to avoid the Biting Cold debuff.
- Storm Cloud = Crit buff. This buff is cast on one player at a time and affects everyone in range. If you get this buff, share it with as many toons as possible as you're running around the room.
6. Damage spikes. - As if everything else happening in this fight weren't enough, Hodir does hit pretty hard. Keep those HoTs rolling on the main tank and try to top him/her off before and after every Frozen Blows.
Should I freak? - YES! This may be the most difficult fight to heal in Ulduar. Healing on the run is what druids do better than any other class, but the heavy damage in this fight makes it impossible for you to get by on your HoTs alone. Use everything in your arsenal, pay attention to everything that's happening around you, and do everything you can to keep the raid up.
Tuesday, June 30, 2009
Healing on the run: Hodir
Healing on the run: Auriaya

Auriaya:
The Pull:
Where to stand - Stack on top of the tank and everyone else against the wall so Auriaya's kitties have no LoS on you. If they see you before they come around the corner, you're as good as dead.
What to watch for -
1. Pounce! - Auriaya's companions have a pounce ability that hits for huge damage. However, they can't use it if they're within 8 yards of the target. This is why the inital pull is so important. If everyone is standing in the right spot the pull will go smoothly and Pounce will not come into play.
Should I freak? - Not at all. Your raid either gets it right or they don't. Get those pre-HoTs going and prepare yourself for a long fight.
The Fight:
Where to stand - Stack with the raid. You do not want to get caught too far away from Auriaya's adds.
What to watch for -
1. Damage spikes! - Like the Iron Council fight, all of your tanks will be taking big hits throughout this encounter. Keep your HoTs up as much as possible and heal big as often as you can. As usual, if the tanks die, you die.
2. Silence! - Auriaya's defender will randomly pounce members of the raid locking out their spells. If you get pounced on there's really nothing you can do but wait it out... which is why it's so important to keep your HoTs up on the tanks.
3. Fear. - Auriaya frequently casts fear on the raid. It's a 2 second cast and it lasts only a few seconds. Get those HoTs rolling on the tanks when you see her start to cast it.
4. Void zones. - Auriaya will summon a defender during the fight that leaves a nasty little void zone that you do not want to stand in. Pay attention to where you are and keep casting.
Should I freak? - Maybe a little. Auriaya is yet another healing intensive fight, but for the most part you will just be standing and casting. Heal big, heal often, and try to anticipate her fear casts.
Wednesday, June 24, 2009
Healing on the run: Iron Council

Kill order: Steelbreaker > Runemaster Molgeim > Stormcaller Brundir
Phase 1:
Where to stand - You'll run with the off tanks past Steelbreaker (the big guy up front) and stop short of Runemaster Molgeim in the middle of the room. Ideally you want to keep all three tanks in range, but that's not always possible. Stick to your assignment, but adjust your position to help other tanks as needed.
What to watch for -
1. Damage spikes! The main tank will be taking big damage from Steelbreaker until you down him, so whether he's your assigned tank or not, keep an eye on them and keep those hots rolling.
2. Brundir's overload! The off tank on Brundir will be kiting him around the room, periodically eating an overload. This is the only damage spike he/she takes, so watch for it, heal through it, and help out with raid heals in between. And for cryin' out loud, don't get close enough to be hit by it!
3. Chain lightning! As usual, the more this jumps the more it hurts. Your raid will interrupt this as often as possible, but when it does get cast, heal up, try to stay spread out, and don't panic. The damage spikes in this phase come slow enough to handle easily.
Should I freak? No. This fight is a survival fight, so healing big and healing often is the name of the game. However, healing is what you do best, so standing still and casting should be a walk in the park for you.
Phase 2:
Where to stand - Phase 2 starts when Steelbreaker dies. Move with the raid to a spot where everyone is in range and keep rolling those HoTs.
What to watch for -
1. Big green runes! You've seen runes before, but none like this. It's easily four times larger than what Molgeim has been putting down thus far, so if you're not running immediately after its cast underneath you, you likely won't make it out alive. Stop casting and move your roots as soon as you see one.
2. Lightning bolts. Molgeim will cast these nasty buggers on random toons. They hit pretty hard, so stay sharp with your wack-a-mole heals.
3. Brundir. Yes, Brundir is still running around, and yes he's still casting overload and chain lightning. This time, however, there are a lot more raid members in his range. Keep watching for overload and heal up anyone hit by it immediately. If chain lightning starts jumping around, raid heal your heart out.
Should I freak? Maybe a little. There's a lot going on at this stage in the fight, runes forcing you out of range of some of your raid members, people getting too close to one another, constant heavy damage on the main tank. You're still just standing and healing, but mana will start to become an issue and the more dps you lose, the longer this phase will take. Stay sharp and focus if you want to live.
Phase 3:
Where to stand - 10 yards or more from everyone else. In range of as many toons as possible.
What to watch for -
1. Lightning ornaments. The only thing new in this phase is the lightning tendril that Brundir will toss out to terrorize random toons. It's possible to heal through these, but if mana is an issue, you're better off running.
2. The same ol' same ol'. Stay out of the overload, watch your range, and heal, heal, heal your branches off.
Should I freak? Nah. If you made it this far, you either have the dps to finish the fight or you don't. This phase is basic tank and spank, so keep healing and hope that enough toons made it to this point alive to earn some sexy loots.
Healing on the run: Kologarn

Kologarn:
Where to stand - Ranged will stand in a line on the left side of the room. You will be at the start of this line in range of your tanks, melee, and every toon that goes running for their life.
What to watch for -
1. Eye beams! Kologarn will focus on random targets with two lasers from his eyeballs that will follow the target around for a few seconds. The reason everyone stands in a line is so that the targeted player can step forward or backward and run to the right side without dragging eye beams through the entire group. If you're the one with eye beams, step back, auto run to the right, and keep tossing out those HoTs. Remember to run back to your spot in line afterward.
2. Shockwave! Kologarn's left arm will periodically do an AoE that hits everyone in the raid pretty damn hard. With all the other damage being put out in this fight, EVERYONE has to be topped off after a shockwave a soon as possible.
3. Stone grip. Kologarn's right arm will randomly pick up a player and do heavy damage to them until the arm is damaged enough for Kologarn to let go. Who ever is picked up will need a healer's direct attention. Keep them alive, but don't get tunnel vision. There's a lot of other things going on you should be paying attention to.
4. Your tanks. Kologarn does heavy consistant damage to your tanks, as always keeping them up is priority #1. Also, two tanks will be passing Kologarn back and forth as they get the armor debuff. Your job is to pre-HoT the tank that is about to taunt and top off the tank that already has the debuff. You'll be healing to OOM in this fight, so don't be afraid to heal big and heal often.
5. Adds. An off tank will be picking up adds throughout this fight. Keep the tank up and watch for toons who gain aggro before the tank can taunt. Shockwave + loose adds = dead toons.
Should I freak? Yes! Kologarn is a healing intensive fight. With eye beams being dragged around the room, adds causing havoc, three targets constantly needing direct heals, and a shockwave that brings everyone below 50% health, you will have to be on the ball to survive this fight.
Monday, June 22, 2009
Thank you Blizzard
Wow.
Let me start off by saying "I sympathise 100% with everyone who put the effort into progressing through heroic Ulduar to earn their conquest emblems the hard way." Your feats are not cheapened by patch 3.2.
That being said... thank you Blizzard.
I'm somewhat ashamed to admit that in recent weeks (after the discovery of warcrafter.net) this druid became preoccupied with gear scores and server rankings. Once a casual player, I found myself raiding more and more, keeping my evenings free to try and pug into any Ulduar/VoA/EoE runs that I could, all in the pursuit of newer flashier sexies. The game was no longer a game, it was one big farming session, all for the satisfaction of reaching higher and higher scores on some website that had little to do with... anything.
Somewhere along the line I lost sight of what made WoW fun to play in the first place. Now that Blizzard is handing out conquest emblems like candy on Halloween, I realize that the satisfaction came from struggling through long and difficult boss fights (before several nerfs) not from the slight upgrade from 213 to 226.
It's time to get back to healing. Forget about topping recount lists or being the best geared druid on your server. Focus on being the best healing druid on your server and it won't matter what everyone else is wearing (or how they got it).
Thank you Blizzard... for the wake up call.
Friday, June 19, 2009
Healing on the run: XT-002 Deconstructor
 If you've been pulled into an Ulduar group, but you haven't had the time to watch the vids or read the blogs, here's a quick reference guide on what you *should* know about the XT-002 Deconstructor fight. Good luck!
Deconstructor:
Phase 1:
Where to stand - Your raid leader will most likely assign you to either the left or right side. Which ever side it is, line yourself up with Deconstuctor's corresponding foot and make sure the main tank and melee group are in your range.
What to watch for -
1. Damage spikes! Deconstructor will hit your main tank hard right off the bat. Make sure you have your tank pre-hotted before the pull, and keep those heals coming as you're moving into position.
2. Tymphatic Tantrum! This nasty AoE is a damage over time spell that hits everyone in the raid and hits them hard. You absolutely need to get everyone topped off after one of these as another tantrum will be soon to follow.
3. Gravity bomb. This debuff is on a timer. Who ever gets it must move 20 yards away from anyone else in the raid or else they will be pulled together doing damage to all affected. Who ever gets this debuff must also be topped off before they move out of range because it does a fair amount of damage when it procs.
4. Light well. The second debuff Deconstructor will cast on random targets. Who ever has this debuff must also move away from the raid, but not nearly as far as with gravity bomb. Only people standing in the light well graphic will be affected. It's a DoT so hotting up the person affected with it will be fine.
Should I freak? - No. Phase 1 can get a little hairy if tantrums come at bad times, but if you use your HoTs effectively, you should have no trouble keeping the raid going.
Phase 2: Heart phase.
Where to stand - You will stand in the same spot you were in phase 1.
What to watch for -
1. Scrap bots! These little adds will emerge from the four scrap piles in the corner of the room and head straight for Deconstructor. Each bot that reaches him will repair him, returning a certain percentage of his hp. Your job is to keep everyone topped off during this phase, but if you see scrap bots getting close to deconstructor, don't hesitate to use your stomp or cast hurricane on them.
2. His heart. At the start of phase 2, there will be no adds, no tantrums, no debuffs, just his heart. After you have everyone topped off, feel free to do some dps on the heart as it does double damage to the boss at the end of the phase.
3. Bomb bots. Along with the scrap bots, bomb bots emerge from the four scrap piles during this phase. They explode when killed, so don't get too close to these guys.
4. Off tanks. Pummelers are the third and final type of add in this phase. They will be picked up by the off tanks and pretty much ignored by everyone else, eventually dying from AoE. They don't hit hard, but if they're still up during a tantrum your off tanks will need to be healed up immediately.
5. Phase 1. The heart phase begins when Deconstructor reaches 75% hp and lasts for 20 seconds. Once it ends you will return to phase 1 until Deconstructor reaches 50% hp, then again at 25% hp. Be on your toes at the start and end of a new phase as that is when the fight is most hectic.
Should I freak? - No. Deconstructor is a dps fight. Tantrums will certainly keep you on your toes, but you're a druid... raid healing is what you do best. Other than when you're debuffed, you can basically stand in one spot and heal for the entire fight.
Thursday, June 18, 2009
Healing on the run: Ignis
Ignis:
Where to stand - In the middle of the room between the two pools of water. The main tank will kite Ignis in a square around you, so you should only have to strafe left and right to get in range of melee and your off tanks.
What to watch for -
1. Flame vents. These shoot up from the ground throwing everyone into the air. If you're casting a spell (not including instant casts) when these are set off, you'll be silenced for 8 seconds. So obviously you want to stay away from Regrowth, Nourish, etc... when Ignis begins to cast these. Also, the entire raid will take damage from flame vents so get those HoTs rolling.
2. Slag pot. Ignis will randomly pick up a player and throw them in his slag pot. Who ever he picks up will need some attention as the slag pot puts out a big amount of damage over time. If you're the one thrown in the pot, you can heal yourself and anyone else in range while you're in there. When he drops you out of the pot, run back to your starting point and try to avoid running through scorched ground.
3. Your off tanks. There is no enrage timer on Ignis, but for each construct that is running around he gains 20% damage. Its your off tanks job to make these guys brittle, which means spending a good deal of time standing in Ignis' AoE and taking a pounding from the constructs themselves. Keeping both of your off tanks up is the only way to win this fight.
4. Constructs. These adds have a nasty habit of getting away from their off tanks... at least for a little while. Keep an eye on these buggers and be ready to direct heal any toon they run after.
Should I freak? - Yes! This is a healing intensive fight and you need to be everywhere at the right time. The main tank will be taking heavy damage from start to finish, so even if you're raid heals you'll be topping the MT off quite a bit, especially near the end of the fight. Also, flame vents happen frequently, so keeping everyone up will be a full time job.
Wednesday, June 17, 2009
Twig Heals: 101 - Gift of the Earthmother (pre 3.3)
At the end of the restoration tree there’s a talent that a lot of druids may not fully understand. It’s a 5 point talent that seems to benefit three very important healing spells, but if you’re new to level 80 or just a casual player you’re probably not 100% certain about how or why. That talent is called Gift of the Earthmother, and this blog will help you decide if it’s a gift you’ll want to return.
Before we can discuss what GotE does, we have to understand what a global cooldown (GCD) is. Basically, GCD is the time we have to wait after casting one spell before we can cast again. I’m sure you’ve noticed that you can’t just turbo click on lifebloom and have it cast every time. With zero haste and zero talents, that GCD is 1.5 seconds… and it can seem like an eternity if/when we’re in a pinch. GotE reduces that GCD on your rejuvenation, lifebloom, and wildgrowth spells by 4% to 20% depending on how many points you spend.
Is it worth it? Let’s dive in deeper. With zero haste, GotE will have the following affect on rejuvenation, lifebloom and wild growth…
1 point = GCD of 1.44 seconds
2 points = GCD of 1.38 seconds
3 points = GCD of 1.32 seconds
4 points = GCD of 1.26 seconds
5 points = GCD of 1.2 seconds
Three tenths of a second might not seem like a lot in the grand scheme of things, but it’s a noticeable difference. Especially in those hairy moments when you’re trying to HoT up as many targets as possible before a raid wide damage spike occurs.
Well then, that settles it. Gift of the earthmother is worth getting… right?
Not so fast. Before you go spending 5 talent points, let’s step out of the zero haste bubble and step into the real WoW world. Chances are if you’re a raiding tree who’s considering this talent, you’ve managed to acquire a haste rating somewhere along the way. Assuming that’s the case, the GCD on ALL your spells is already under 1.5 seconds. If you’re curious just how far under, here’s a rough formula to help you figure it out.
GCD = 1.5 – ((Haste/32.79)*.015)
I know, I know, this is getting kind of technical. Let me try to simplify. In mostly Naxx 25 gear, my haste rating is 374. If I plug that into the formula, my GCD is approximately 1.33 seconds. And that’s with zero points in GotE. Not too shabby. My GCD is already roughly where it would be with 3 points in GotE and zero haste. Am I going to notice a difference if I spend my talent points on top of what my haste gives me?
Short answer: Maybe, maybe not.
With diminishing returns, I would need 5 points in GotE and a haste rating of 505 to lower my GCD to 1 second flat (505 is the oft discussed haste “cap” and 1 second is the lowest GCD you can have). That same haste rating with zero points in GotE would give me roughly 1.27 seconds on my GCD. Allowing for human reaction time, the duration of a single mouse click, down time in battle, and all the other spells we utilize, how many more casts will you realistically gain during a typical boss fight? Remember, you’re spending 5 talent points to earn those “extra” casts.
The down falls of GotE are these. First and fore most, it costs up to 5 talent points. With living seed, revitalize, natural perfection, etc, already begging for talent points, is 3 tenths of a second really THAT noticeable. Second, GotE reduces your base global cooldown ONLY after you cast rejuvenation, lifebloom or Wild Growth. If you throw a nourish or a swiftmend in there, you’re going to have to wait the full GCD to cast again. Third, GotE deals in tenths of a second… no matter how you slice it. Are you that precise with your casts that you can utilize those tenths every time in real WoW situations?
In my opinion, Gift of the Earthmother is looking more and more like its headed for the customer service returns line. There’s certainly a place for this talent with under geared druids who have little haste and need to stick to spell power and spirit gems if they’re going to raid successfully. But if you’re an established raiding tree, have the means to even consider approaching the haste “cap” and are considering this talent, I would advise you to pass on it unless you absolutely do not want revitalize, natural perfection, living seed, and living spirit.
Just one tree’s opinion.
Healing on the run: Razorscale

Razorscale:
Phase 1:
Where to stand - You'll want to be near the middle of the circle, shading to the left, center or right, depending on where your assigned tank is picking up the adds.
What to watch for -
1. Flame breath! If you see a blue ball fall on your head or blue flames covering the ground, run! Trees and fire do not mix.
2. Fire balls. Razorscale throws these down at random toons quite frequently. They hit marginally hard. Healing through these is truly like wack-a-mole.
3. Chain lightning. As always, chain lightning hurts if you're not spread out. Watch your range and hope everyone else does as well.
Should I freak? - No. Phase 1 moves at a fairly slow pace. Use your down time to conserve mana and to keep an eye out for blue flame.
Phase 2:
Where to stand - Anywhere EXCEPT for in front of Razorscale. She doesn't have a tail whip, so when she comes down to the ground you can move freely behind her and to the sides to throw your heals out.
What to watch for -
1. Main tank damage. This phase of the fight is basically tank and spank. Keep your main tank topped off and watch your off tanks while they hold the adds.
2. Deep breath. If your raid doesn't get Razorscale down to 50% health in a certain amount of time, she will fly back up out of reach and you'll start phase 1 again. When this happens, she'll toss everyone in the raid into the air doing a little bit of fall damage. It's easy to recover from, so hustle back to your spot and pick up where you left off.
Should I freak? - No. Phase two is all about rolling HoTs on your tanks. If there are adds up or if there's a flame breath in the middle of the circle things could get interesting. Otherwise, it's a piece of cake.
Phase 3:
Where to stand - In the middle of the circle again. Your main tank will be kiting Razorscale around the raid, so as long as you stay in the middle you won't take much damage.
What to watch for -
1. Your main tank! Razorscale hits hard and hits consistently in this phase. Get all of your tanks topped off and keep them there until the fight ends.
2. Fuse armor. Your tanks will get this debuff as they engage Razorscale. Eventually they will stack to the point where another tank has to taunt off this boss. When that happens, switch your focus immediately to the new tank.
3. Adds. There will likely still be some dwarf adds running around. Your off tanks will be picking them up, so you'll need to give them some love.
4. Wing buffet. At the start of phase 3, Razorscale will knock everyone back doing a fair amount of damage to the raid. You'll have bigger fish to fry at this point, but you should get everyone topped off sooner rather than later.
Should I freak? - Still no. Phase three is the hardest part of this fight, but as long as you're paying attention to which tank has aggro your job is easy. Watch your mana, and try to toss an innervate out to a priest or shaman near the end of this fight.
Razorscale is probably the easiest boss to heal in Ulduar. However, it also gives you a taste of how important it is to pay attention to where you are standing. If EVERYONE stays out of the blue flame, this fight is straight forward. Have fun in there!
Friday, June 12, 2009
Twig Heals: 101 - Out of the forest and into the talent trees
Thursday, June 11, 2009
For Blood and Honor: Flame Leviathan
“Let’s get a ready check.” a voice declares. I lean forward in my seat as our guild master continues. “The gate opens after this pull.” I angle my demolisher to the left, aiming my cannon in the middle of the last group of defenders guarding the steel gate. Akulu’s voice again cuts the silent air, “Passengers, get ready to load into the catapult when Flame Leviathan comes out.” I postulate that our rogue leader gained this information from Brann earlier at the base camp… but I'm far from certain. “How else could he know?” I ask myself reaching down to my trigger. There’s no more time to wonder as the first missile lights up the last Colossus like a lantern.
The defenders die much like those before them and we form up in front of the gate waiting for it to swing open. I turn my head and listen for the familiar click of turning gears. Nothing. “Maybe we…” A jolt stops my thought dead in its tracks as a mammoth machine explodes through the gate splintering steel as if it were timber. Flame Leviathan jerks to a halt, grill to grill with our now seemingly undersized tanks. We scatter. Left or right, it doesn’t matter. Anything too…
“Stay away from it!” Akulu exclaims. “Let’s launch some people up there to take out those turrets.” Leviathan turns to pursue one of our siege engines. “Shields!” Kwaggmire barks at his gunner. “Shields up!” he repeats. I turn my demolisher to square up with Leviathan. “Quiver this.” I mutter to myself as Pothek is catapulted into the night. “And please don’t miss.”
The tactical war rages as Flame Leviathan takes turns chasing each of us around this fenced in corner of the courtyard. We’re moving as a unit now. Choppers drop oil slicks around our kite path, siege engines ignite those slicks as our foe approaches them, demolishers keep their distance sending a barrage of fireballs crashing down on top of it. “Interrupt those flame jets.” Our leader declares in a shockingly calm voice. “He’s close to a shutdown.” Right on queue Leviathan is stopped dead in his tracks. Pothek and the others assaulting the turrets are expelled into the air floating harmlessly down to earth in parachutes. I shout up to Pothek as I roll under him into position to fire my pyrite “Where the hell did you get a parachute?”
Broken machines litter different corners of this battle field. Sadly, my trusty demolisher is one of them. Smoke, fire, and my comrades rise from the ground as Akulu surveys the scrap heap that was once Flame Leviathan. “Nicely done, everyone.” he announces sifting through the wreckage. “Let’s move up.” Face down I lay exhaustedly waiting to be revived. “Is this place going to break me?” I wonder quietly to myself. Lifting my head I glance at a chopper riding by just in time to notice its license plate. Rising to my feet, I laugh to myself as I read it allowed. “Pwned.”
For Blood and Honor: Flame Leviathan (Trash)
The expedition camp we find ourselves in is riddled with salvaged war machines. Demolishers to the east, siege engines to the west, Choppers enticing us straight ahead, all of which just begging for a test drive. We each take turns stealing glances at the beckoning vehicles while we await instruction from our fearless guild master. Akulu, as mysterious as he is unassuming, speaks privately with Brann Bronzebeard before addressing his faithful followers. Several of our group huddle around Whippet and his wares while I inch closer to a demolisher, hoping no one takes notice. My progress is halted with Akulu's return to our ranks.
His instructions are clear and concise.
Siege Engine Driver – ram down buildings, knock back enemies, and boost speed to move into or out of harm's way.
Siege Engine Gunner – bring down pyrite ammo, assault air borne enemies and assists in shooting targets on the ground. Ignite oil slicks with the anti-air missile as well.
Demolisher Driver – fire long-range fireballs and special pyrite barrels that deal massive damage. Catapult a passenger on to the tank that awaits us when the time comes.
Demolisher Gunner – salvage pyrite ammo and refill your demolisher, fire long-range fireballs and anti-air missiles, and boost speed to move into or out of harm's way.
Chopper Driver – create flammable oil slicks behind you and quickly pick up any players on foot to protect them from danger.
Gear ultimately affects the durability of the machine we choose to captain, but the talent of this group is such that all are capable of filling any role in this skirmish. The choice, as so often is the case, is left to us. My inching pays off as I make haste to the nearest demolisher and await the soul brave enough to ride along side me. Pothek is equal to the task and I quickly comment on how orcs make such wonderful projectiles. As we maneuver into position he promises to use me as a quiver should I over shoot with my catapult. The visual barely has time to form in my mind before the archmages drop their shield and I have my first glimpse of the gauntlet laid out ahead of us.
As sobering as it is vast, this awe inspiring courtyard is occupied by a sea of Steelforge Defenders and Ulduar Colossi... further than the eye can see. Storm beacons dot this expanse acting as control centers. My eyes widen at the sight of the first fireball being hurled from Akulu's war machine. I roll forward deliberately and poise my cannon to fire one of my own. We certainly have them stirring now... and this terrible gauntlet scrambles to action.
Straight ahead, we lay siege to this courtyard with reckless abandon. Waves of defenders flow out of nearby storm beacons until we reduce them to rubble. Colossi approach us slowly but methodically and we do not hesitate to give them our full attention. To the east, a tower of a different sort challenges us, guarded by more steelforge and an oversized mechanical spider whose stare cuts through our steel armor like butter. The machines we pilot are built for war, however, and much like exterminators we purge the courtyard of these pests, leaving more rubble in our wake.
The trip across the now cleared bridge offers a moment to rest my trigger finger and to take in the wide open battle field. Brann’s voice crackles over my radio with the sound of whirling propellers behind it. His voice goes silent a moment later, but the background noise lingers. “Must be an echo.” I think to myself as I continue over the bridge. Now growing louder, I straighten up in my seat. “What is that?” “Choppers to the left!” Akulu calls out. This takes a moment for me to register. “... the hell did he just say?” I mutter to myself unbelieving before I turn to look. Teams of helicopters swarm on us from above firing a barrage of missiles at my broad side. “Son of a…!” Panic is replaced by exhilaration as Pothek is already returning fire and proving convincingly he knows how to handle a turret. “I just like to shoot stuff” he reports modestly. My eyes focus forward now as we leave broken air ships behind and take aim on the second tower to the west.
Glowing discs on the ground deep into the court yard repair our worn tanks instantly, and after leaving our mark on the fourth and final tower we suspend our siege and wonder what manner of terror awaits us behind the steel gate taunting us from the back of the room.
Our wonder would be short lived as Ulduar's first big surprise makes its grand entrance...
Sunday, June 7, 2009
Twig Heals: 101 - Bring the lumber
As great and as versatile as your HoTs are, they can't handle every situation you come across while raid healing. There will be times when a target needs a big heal, and they need it now. When you don't have time to wait for ticks, you have to bring out your direct heals. Direct heals, for those who don't know, are healing spells that do all of their healing in one shot... no ticking, no stacking, no waiting.
Let's take a look at our arsenal.

Over zealous hunter pulling aggro early? No problem. Finish stacking your HoTs on the MT, then bring the 'tard back from the brink with a 16k crit.
Main tank down with the boss at 10%? No worries, mate. Use this to keep your top DPS alive while the OT gets in there to taunt.
Everything going right in your raid? Grats! You can still use this spell to your advantage. Let your tank tick down to 50% hp while you HoT up those taking AoE damage, then pop HT to bring the tank back full.
Nourish:

Breakdown: Compared to other classes, druid direct heals seem slightly underpowered... which is why most people think we're not great single target healers. But when used intelligently in conjunction with our HoTs, there really is no fight a druid can't main tank heal.
Saturday, June 6, 2009
Twig Heals: 101 - Its getting HoTs in here...
Lesson 1: HoTs
Regardless of how you reached level 80, you should have some understanding of your heal over time spells and how to use them. What I'm certain you'll notice when you start putting points into the restoration tree is that your HoTs are getting huge buffs. This is no coincidence. Use them early and use them often. Let's break them down to the twigs...
Rejuvenation:
Cast time - Instant
Cooldown - Global cooldown only
Mana cost - 18% of base mana {Reduced by the moonglow and tree of life talents}
Duration - 15 seconds {18 seconds with the Nature's Splendor talent}
Effect - Heals once every 3 seconds for its duration
Breakdown: Rejuvenation is your main pre-hotting spell. It lasts long enough and is mana efficent enough to roll on multiple targets constantly. It also 'arms' your swiftmend ability allowing you to instantly respond to damage spikes on anyone you've pre-hotted. With talents and gear, this spell can tic for 2k-3k hp (or 10k-15k over its duration).
Regrowth:
Cast time - 2 seconds
Cooldown - Global cooldown only
Mana cost - 29% of base mana {Reduced by the moonglow and tree of life talents}
Duration - 18 seconds {24 seconds with the nature's splendor talent}
Effect - Begins with a direct heal then heals once every 3 seconds for it's duration.
Breakdown: Used mainly as a direct heal, Regrowth can be used as a pre-hot when single target healing. However, the 2 second cast time and mana cost make it unwise to try to spam this heal across the raid. You will find that the direct heal/HoT combination make it an excellent first cast when trying to recover from huge damage (you can crit heal for roughly 8k and begin casting other spells while it tics for 1k every 3 seconds), but mana efficiency is the name of the game in raid healing, and this spell leaves much to be desired. This spell is being replaced by Nourish on many UIs.
Lifebloom:

Cast time - Instant
Cooldown - Global cooldown only
Mana cost - 14% base mana {Reduced by the tree of life talent}
Duration - 7 seconds {9 seconds with the nature's splendor talent}
Effect - Heals once every second for it's duration ending in a direct heal {stacks up to 3 times}
Breakdown: Lifebloom is another good pre-hotting spell. It's effectivness increases the more it stacks, however the increased mana cost make it difficult to stack constantly or on multiple targets. Your level of experience will impact the affectiveness of this spell. Knowing when and when not to stack or how to time the 'bloom' come with knowing when and where damage spikes occur in each boss fight. Lifebloom will tick for 500hp, 1k, or 1.5k and bloom for 5k, 10k, or 15k depending on how many times you stack it. A +20k crit is possible with this spell, but will be slightly less with the 3.2 patch (20% reduction).
Wild Growth:

Cast time - Instant
Cooldown - 6 seconds
Mana cost - 23% base mana {Reduced by the tree of life talent}
Duration - 7 seconds
Effect - Heals up to 5 raid members within 15 yards of the target ticking once every second for it's duration (with diminishing returns on each tick)
Breakdown: This is a must have spell for all raid healing druids. With the wild growth glyph you can heal 6 targets at the same time for around 4k hp when all is said and done. Its a great way to respond to AoE and raid wide damage. It's downfall is that you can't control which targets receive the heal. If you cast it on a toon and no one around them needs a heal, only the toon you cast it on will get the heal. It will land on pets, it will land on targets with full hp, it will drive you crazy, but it's worth it.
Overview: HoT healing is all about anticipation not reaction. These spells take time to work their magic (hence the name) so you will have to learn where and when damage comes in boss fights if you want to be able to heal them sucessfully. You'll also discover that the better you are at keeping these spells rolling the better your overall healing will be.
Every druid developes their own healing style. Some lead with Rejuv, some with LB, others with Regrowth. Some keep their HoTs ticking on as many targets as possible, others use their HoTs to bridge the cast time between direct heals. Either way, you'll learn what works best for you by getting out there and doing it. Good luck!
Identitree crisis: Starting out Druid
Thus... Beck was born.
That was 3 years ago. Four guilds, nineteen re-specs, and eighty levels later, Beck continues to be my main and my favorite toon to play.
Some ask, "Why resto?" Short answer is... it suits me. Like most, I leveled to 70 as a feral druid. Shape shifting, dpsing, tank and travel forms, and survivalability are what hooked me on the druid life. And as fun as that was, I always found myself watching for toons around me who were in need of heals... throwing out buffs to all who crossed my path... even healing up guards early on in XR while high level Alliance made themselves feel special by ganking the town. Its just in my nature to help, so resto was the obvious choice.
There are plenty of boomchickens out there who swear that the balance tree is the best and truest tree for the druid race. Its there that you find a true mastery of nature's forces, and as most of us can attest to, mother nature packs one hell of a punch. Honestly, I hold the balance tree in high regard. I leveled through WotLK in moonkin form, and continue to dual spec boomchicken to this day. However, it boils down to one simple phrase. You either choose to restore or destroy... if you're reading this blog you know where I stand.