**Waits for the applause to die down**
Twig Heals is a year old, and I'm going to take the lazy route here and post a "look back" blog to celebrate! (Sorry, there's no time to write a shiney new post, I have to leave for work in 15 minutes.)
Without much adieu, here are some of my favorite posts from this past year. I hope you enjoyed reading them as much as I did writing.
5. Grrr! 'Nerf' should be a four letter word...
There have been a lot of tirades on this blog, but my rant about the ICC buff is probably my favorite. I still secretly wish our GM will "accidentally" disable the buff one night to see how we fare, but that's mostly because I'm a bit of a wow massochist. Maybe after we down LK? =D
4. On the hunt: Time-Lost Proto Drake
I obsessed over this rare spawn for months and months, scouring the interwebs for any and all information I could find on it, all in an effort to score me a super sexy flying mount. I never did get to kill it though (not yet anyway), but I did compile all the info I found and posted it on the blog for all to see. My hope is that somebody, somewhere out there, is flying around on a TLPD saying "Thank you, Twig Heals!"
3. To be... Or not. RP
Ok, so RP never really was my thing. There are so many unwritten rules, so much lore to keep straight, and it's so hard to RP duel while an Alliance rogue is chewing your face off. Still, I had a lot of fun coming up with a back story for Beck, and I'm glad I shared it with you all (I learned a ton about RP from your feedback emails.)
2. Exiled: The Gauntlet
One of my favorite nights of WoW came while I was playing my alt Pally, and I wrote about it here. I like to think of it as a story of determination, courage and adventure... though it may have just been about two drunk idiots and a rogue. Either way, I hope you enjoyed it.
1. For Blood and Honor: Razorscale
Every time I read this story I get the same sense of excitement I got when we first downed Razorscale soooo long ago. And every time I read it I remember all the "faces" that were there, and all the personalities, and all the fun we had. This is without a doubt my favorite post on my blog.
Thank you all who've shared in my experiences over this past year (and especially those in game who've been sharing experiences for so much longer). Here's to hoping the next year is atleast as good as the first. =D
~Beck
Wednesday, July 21, 2010
Saturday, July 17, 2010
Shared Topic: When should a healer let someone die?
Okay, okay, so I'm a little late to the party (it's been a hellaciously long couple of weeks for me) but Ecclesiasticaldisc posed this question on Twisted Nether recently and I feel the urge to put in my two cents.
The question is:
When should a healer let someone die? Where do you draw the line on shifting the priority of someone’s heals down (or refusing to heal them all together)? Is it if they upset you personally? If they are consistently standing in the fire? If they have lame dps? If they aren’t managing their aggro? If they go afk for fifteen minutes in the middle of a boss fight? Is it only when it’s jeopardizing the entire group’s success? I believe there is a point for every healer, but where does the gray area fall?
The short answer: Never.
Here's a quick story for you. Several months back our guildies scraped together a group for the weekly, which happened to be Razorscale. Of the 10 toons in the raid, nine were being operated by warm bodied human beings, while the 10th was a toon belonging to the husband of one of our guildies and was being towed through Ulduar on follow. Just so the husband's toon did not miss out on 5 emblems while he was away at work, his wife logged on to both PCs and both accounts, put her hubby in her seige engine for FL then parked his toon next to the turrets for Razorscale.
Not surprisingly, during the fight the MIA toon took fireball after fireball to the face and even spent some time roasting in flame breath. Completely out of range of heals and offering nothing by way of DPS, I imagine most people would've let the toon die and collect his emblems as a ghost. But not me. I hauled bark halfway across that room every time he took a hit and stood there healing him until he was out of danger.
Having to justify my actions to the raid leader, I made up some BS about how the toon's presence was saving someone else from taking fireballs and "at least he wasn't dropping flame breath in the middle of the room." But to be honest, I made the choice I made because I believe a healer's job is to keep everyone alive no matter what.
If a toon was a jerk to me (and it has happened quite a bit over the years), I would still heal them (and would consider myself an even bigger jerk if I didn't).
If some under geared, under skilled dpser was doing less damage than the tanks, I would still heal them (and be proud that I was able to see them through to the end of the fight).
If a noob was standing in fire or dropping some AoE nastiness on the raid, I would still heal them... or try to at least. (Would I be making my job easier by letting him/her bite the dust? Yes. But easy doesn't make it right.)
My job as a healer is not to decide who lives or dies, or what's best for the raid. My job is to find a way to heal whatever group of toons through whatever raid encounter with as few casualties as possible. If that means paying extra attention to the jerk in the fire doing white damage along with everybody else who has the misfortune of standing next to him/her, then that's my job.
And if you'd rather pass on that kind of challenge to go farm some loot that you're just going to replace in a month... then we don't see eye to eye on what makes this game so much fun to play.
Just my two cents...
~Beck
Friday, July 9, 2010
Back that thang up
I ended my last blog with "The masses are speaking. Let's find out if anybody at Blizzard is listening." It turns out that they were.
Nethaera announced this morning that Blizzard has decided NOT to require real names on the official forums.
/cheer
I tip my cap to all who campaigned against Blizzard Entertainment's announcement. Your voices were heard and you won one for the little guys.
And a nod of respect also goes out to Blizzard for making the tough/correct choice to reverse their original decision.
Here's to hoping awareness has been raised to just how much of your personal information can be found on the web. And let's keep our fingers crossed that the changes Blizzard is moving forward with will bring about a decrease in trolling/flaming on the offical forums.
Thursday, July 8, 2010
Real ID goes to the forums
"I'm just an average man
With an average life
I work from nine to five,
Hey hell I pay the price
All I want is to be left alone
In my average home
But why do I always feel like
I'm in the twilight zone?
I always feel like
somebody's watching meeee
and I have no privacy..."
~Rockwell
Ah yes, Blizzard's newest announcement has their forum community singing a new tune these days. Soon, you will be required to disclose your Real ID (first and last name) in order to post on the offical forums.
My first reaction... "-_-"
To be honest, I am not an active poster on the offical forums (or any forums for that matter) so the change has little effect on me personally. Thinking ahead, should I ever feel the need to post on the forums (e.g. Blizz decides to rock my world with another "ToL on cooldown" type announcement) this Real ID news would do very little to deter me.
Do I have a common name? No. I've only been able to find one other person in the US who shares my first and last name, so it would not be too difficult to locate me (or him for that matter).
Am I an exhibitionist? No more so than most I suppose. I have a facebook profile. I have a blog that links to it. Clearly I must crave some attention / enjoy exhibiting my RL.
Do I fear the repercussions of connecting my character to my real life self? No. There's nothing I would say in "character" that I would not in person. There is nothing I do game related that would jeopardize my job/life/reputation. The golden rule doesn't stop at login screens. There's little doubt that anybody who had desired to find me/my info would have already done so even before this change takes effect.
So, do I agree with Blizzards announcement? Absolutely not.
I'm not "upset" about this news, because I'm detached from its effects, but it's blatantly obvious to me how terrible a decision this is for those who will be very much affected by it. The logic behind it is shaky at best...
"Removing the veil of anonymity typical to online dialogue will contribute to a more positive forum environment"
Perhaps. But, if that's all Blizzard has in the "Pros" column, they've obviously neglected to weigh the negatives.
A very one sided debate rages (see here, here, and elsewhere) across the online community, and if there's any justice left on the net, WoWaholics will not be forced to choose between their hobby and their privacy.
The masses are speaking. Let's find out if anybody at Blizzard is listening.
Friday, June 4, 2010
Exiled: The Gauntlet

Left of the ring, before the first brazier, on the way to plagueworks, the wall of ICC juts outward creating what can only be classified as a nook. This is where Rylus and I find our toons standing and waiting... check that... not standing. A circling Val'kyr made its turn toward us, due momentarily to fly directly over our heads, and our best plan for survival is to... sit down.
My GM, Rylus, and I, now SITTING in a nook, all alone in ICC, take a moment to wonder if this was a mistake. In a few moments we would find out. The whole reason we were here was a mistake to begin with. A guild ICC alt run had ended 90 minutes earlier. In its haste, a piece of loot had been left on Festergut's corpse. More specifically, a piece of MY loot had been left on Festergut's corpse, and I was determined to get it.
I had noticed the piece missing from my bag while purchasing gems in Org mere minutes after the raid disbanded. Quickly I invited Laenicus, one of my oldest guildies, to a group, converted to raid, and hauled tail back into ICC to claim my goods. I let out a sigh of relief as I moused over Festergut and saw a loot bag on his corpse. My gloves were still there! "Yay." But I could not loot them to myself. "Boo."
I was forced to wait. Thirty minutes, one GM ticket, and three rooms of respawned trash later, my guild master was able to get in touch with the only toon who could hand the gloves to me. The loot master. Rylus, using his expansive powers of 'wow'dom, assumed control of the loot master's toon, and joined me in ICC.
The gauntlet was set.
The problem: How to get a shaman through three rooms of trash mobs to loot a boss.
The solution: Improvise.
Dear readers, allow me to take this moment to tell you there may have been a few spirits consumed during this decision making process.
Understandably, our guildies were skeptical of our odds of success. Rylus, on a shaman he had never played before, and myself, on a pally alt who had never been in ICC before this night, did not inspire much faith in our cause. This was the reason our calls for assistance were met with responses like "You're crazy." "Waist of time." "Just open a ticket."
Exiled in ICC, we listened as EVERYONE told us it could not be done... save one.
Pinko, a rogue you may recall from my tales of Ulduar, had spent his night carrying our ICC 10 all the way through plagueworks. It'd only be fitting that he volunteer to rescue our rescue mission. Volunteer he did, and rescue he would. But back to the story.
Slowly, menacingly, the Val'kyr made its way in our direction. Sitting at my desk, I started ducking my head as the Val'kyr grew closer. (Why, I do not know. Why do truck drivers duck when they go under a low bridge? It's just what people do.) Ducking, holding my breath, giggling at the absurdity of the situation, I watched as the Val'kyr flew by without detecting us. "Unbelievable." I thought aloud. "This might actually work."
The first obstacle was cleared, the next awaited, and it was time to enact "The Plan". Our 6 to 8 step plan involved pally bubbles, sprint potions, an ahnk, a DI, and gobs of luck.
It did not work.
The abominations, scientists, and geists proved too much for us to survive. Still, our spirits were high. Attempts 1, 2, and 3 had failed, but now Pinko was on the way and things were looking up for attempt number 4. Our new "The Plan" consisted of 12 to 15 steps, involved basically every pally, shaman, and rogue talent we could imagine, and crazy as it may seem, actually made sense... to us.
Once again sitting in a nook, Rylus and I watched as Pinko stealthed right up to the belly of an abom. We waited as we had waited before, waiting again until it was time to not be waiting anymore. The Val'kyr patrolled by, the geists came into range, and then...
Pinko shot at the circling geists, pulling agg on the aboms, popping evasion and sprinting his rogue booty across the room. The mobs followed. Rylus and I waited for the doorway to clear then hustled up the stairs to the plagueworks' hallway. One by one we aggro'd mad scientists and geists as we ran down the hall. We laughed at Pinko laughing at how far he was kiting those aboms. Our lead on the geists soon shrank to nothing. I bubbled Rylus, dropped consecrate, popped a lay on hands, and died with out-stretched hand as we made the right turn towards Festergut's room. I watched as my GM became slimed, inching in epic slow motion toward the finish with mobs catching him from behind and beating him down. Steps from the door and unable to cast a thing, Rylus willed the loot master's toon across the threshold and into Festergut's domain.
Death. Reset. Ahnk. Loot! (And Pinko still kiting)
The last 4 steps of the 15 step plan were my favorite. =D
Nay sayers be damned. Three toons, exiled in ICC, ran a gauntlet to help a guildie and came out victorious.
My gratitude goes out to those two guildmates who refused to quit. Thank you Pinko! Thank you Rylus!
Note: The GM ticket was closed after 2 and 1/2 hours having never been answered.
Wednesday, May 26, 2010
Just for fun
Howdy all! It's been a while since I've posted so I wanted to write a quick blog to let y'all know I'm still alive and kickin'. Truth be told, not a whole lot has been happening in game; although my guild just started raid lockouts for ICC 10, so I should be seeing some new content in the coming weeks. (Lich King here we come?)
In the meantime, I've decided to start up a leveling guild on Lightinghoof called "Brotherhood of the Brew" with one of my alts. I love my raiding guild, but there are times when the drama gets a little too over the top... so I created a little drama free zone for me and my friends to go and level our toons in peace (with a little fun and drinking along the way).
As for this blog, you won't see anymore raid guides (unless "Blood and Honor" moves a little closer to the cutting edge in Cataclysm) but I'll still offer up my two cents on resto druid changes as they come about.
'Til then, be excellent to each other... (<---- cheesy movie reference!) :-P
Sunday, April 11, 2010
Why?
"There is nothing wrong with change, if it is in the right direction." ~Winston Churchill
Note to Blizzard: The proposed change to Tree of Life form in Cataclysm is exactly the kind of change that there IS something wrong with.
They say:
"Mechanically, it feels unfair for a druid to have to give up so much offense and utility in order to be just as good at healing as the other classes who are not asked to make that trade."
I say:
The obvious question I have to ask is "Why?" As a raiding tree, if I'm in an encounter where I'm even considering doing some dps, then there is absolutely no reason for me to care about changing out of tree of life form in order to do it.
Taking the obvious question one step further... "Why resto druids?" Boomkins have to change out of form to contribute to heals (other classes are not asked to make that trade). Why change one but not the other?
And, perhaps the most important question... "Why take away our identity?" Why make us the ONLY druid spec that DOESN'T spend all it's time in combat in a single form? Why make us the unwilling druid armor models? Why?
Blizzard doesn't see things my way, and that's fine. Let's talk about ways to address that issue in a way that allows resto druids to keep their identity (and that's what all this hoopla is about, Blizzard... fighting to keep our identity).
You want resto druids to be able to contribute offense and CC without giving up our healing power? Then let us dps and CC while in tree form. Create a very skippable talent in the resto tree that would allow us to do so. Give us the choice! I'm sure there are plenty of PvPers out there who would love that talent... so give it to them without taking away our form. Please?
They say:
"Our feeling is that druids rarely actually get to show off their armor, so it would be nice to have at least one spec that looked like a night elf or tauren (and soon troll or worgen) for most of the time."
I say:
News flash, there are plenty of toons that look like night elfs or taurens. We call them warriors, hunters, shammans and priests (and soon to be paladins and mages). The reason many of us rolled druid is because we DON'T want to look like just another night elf or tauren most of the time.
I would ask you, Blizzard, one more time the obvious question of "Why?" But you already gave me your answer. Because "... it would be nice." (If that isn't the biggest middle finger to trees everywhere...)
Still, fuming as I may be the more I blog about this proposed change (and the "reasons" for it), I have to try to keep a level head and offer constructive (errr annoying) alternatives.
You want to see more druids running around in caster form, bring back the much hated run speed decrease. Force us to do some more shape shifting to avoid AoE in raids. Put increased run speed on druid PvP gear (after all, that is who we're trying to cater to with these changes, correct?), slip it in with another talent in the tree, or just ignore it completely and make us suffer through it. Anything to avoid the alternative.
I just felt the entire resto forest shake their heads at that idea at the same time. But how else can I reply to such a ridiculous proposition from Blizzard ("showing off armor") than with a ridiculouse proposition of my own? I'm willing to endure any manner of annoying/obnoxious druid mechanics to avoid losing Tree of Life form as a passive ability.
They say:
"We hope you enjoyed this preview, and ask that you provide your initial thoughts and feedback on what was presented here."
I say:
Thursday, February 25, 2010
Why you gotta be so needy?
For those of you running daily randoms for your frost emblems, I'm sure you've noticed a trend emerging since the latest patch notes were released. You run your instance (half watching the screen and half doing something else because you're way over geared for these dungeons), you roll through each boss fight in near record time (clicking disenchant on every piece of gear that drops), you down the final boss and toss out your customary "TY for group" in party chat... then you wait for all the rolls before you leave group and take your port back to where ever you came from.
Just a normal day in WotLK heroics, until... you notice some bozo was the ONLY one to click "need" on the frozen orb (AFTER everybody else greeded on it). "Dude... seriously?" Yeah, we all know frozen orbs will be used as currency come patch 3.3.3, and we all know this makes them the only relevant loot in these 5 man dungeons, but what possesses these people to believe they "need" these frozen orbs? What makes them think they "need" them more than everybody else in their party? Do these orb needers know how pathetic I think they are? (If they didn't before they will soon.)
Let's take a look at what these needy frost orb ninjas are so desperate to get their hands on.
•Crusader Orb (6) - Six orbs o' the frozen will get you one crusader orb. Mmmm, k? Triumph badges are so easy to get it's hard to image anyone wanting to grind out orbs for these craftable items (even with the nerf to the mats for those craftables). But hey, who am I to judge. If you'd rather grind on your main to gear out your alt, go nuts (4 donuts) but keep it on the level. K, ninja boys and girls?
•Runed Orb (4) - The low low price of four frosty orbs will get you one shiney new Runed Orb. Go go Ulduar patterns! I'm all for nostalgia armor sets, but com'on... you're not even getting tier gear here. (Three rhyming words in a row... blog bonus points!)
•Eternal Fire - Now we're talking! Straight up trade for a somewhat annoying to grind Eternal Fire. I can just sense all you blacksmiths dusting off your titan steel cooldowns. My server sells these for roughly 8g on AH (with the price likely to drop thanks to all those orb needers.) Is the bad ninja karma really worth it to you?
•Eternal Earth - Slightly less annoying to grind, but still... 1 for 1 trade here. Median AH price on Eternal Earth = 4g. Vendor price for frozen orb = 5g. No economics degrees needed here. You'd probably be losing money by trading in your frozen orbs for these mats.
•Eternal Water/Air/Life/Shadow - You get the picture. One orb = one eternal. Can you imagine people "needing" on eternals? "Lame." Yeah, I feel the same way about these orb whores.
•Frost Lotus - Ahhhh. Here's the culprit. The once nerfed, soon to be buffed, spawn rate of this reagent has driven daisy pickers crazy across azeroth. Whether you're looking to make a buck or simply trying to get your flasks made in a timely manner, one frozen orb for one frost lotus is a great deal. SO... is it okay to essentially steal these valuable commodities from your fellow party members? It sure is. If you're middle name is Ninja. :-p
•Pattern: Frosty Flying Carpet [Tailors Only] (6) - "Don't you dare close your eyes..." For all you Alladin wannabes out there who are thinking "Hey, frozen orbs help me learn stuff for my profession, so I neeeed them." I ask you this... is it OK if I need on every blue that drops in heroic dungeons because the dream shards buy me enchanting patterns? If so, you A. have questionable moral fiber and B. must have brown eyes because you're so full of...
Anyway, the point is this. People who used underhanded tactics to obtain frozen orbs back when they were THE orbs to have were called ninjas. The people who do the same thing now and don't believe they're ninjas are simply lying to themselves. In fact, if you ask me (and nobody did), they are a somewhat more pathetic version of loot ninjas that I like to call "frosty orb whores".
Rant... ended.
Thursday, February 18, 2010
Quick question: Rotface
To insta-cleanse or not to insta-cleanse. That is my question.
Undoubtedly many of you have already cleared Rotface and moved on to bigger and badassier things. So I'm curious to know, how does your raid group handle mutated infection? Do you have it cleansed immediately to remove the -75% healing debuff or do you wait for the infected one to get near the OT before making the ooze drop?
It seems to me, cleansing mutated infection right away makes sense. Granted, dropping the ooze in the middle of melee will increase raid damage, but there really isn't a lot of raid damage to heal otherwise. And it will be easier to keep the infected one alive without that damned 75% decrease to healing debuff... right? I mean, having Mr. or Miss Mutated One running around near the edge, not receiving full heals, and sucking on a 3k dot doesn't make sense in my head.
Still, most of the guides I've read say to wait, and I'm not shy about saying neither way has really worked well for our raid. So, I turn to my faithful reader(s) (gosh I hope I have more than one)...
How do you and your raid handle Rotface's mutated infection?
Tuesday, February 16, 2010
On the hunt: Time-Lost Proto-Drake
The target:

Known flight paths:

Storm Peaks
Spawn times:
Time-Lost Proto-Drake appears to share spawn timers with Vyragosa, another rare spawn monster in Storm Peaks. There are multiple reports putting the spawn time anywhere from every 6 hours to +1 day for Vyragosa, and a 1 in 16 chance of Time-Lost Proto-Drake spawning in her place.
Camp spot:
Over the Bor's Breath waterfall southeast of Valkyrion village. {TLPD flies roughly 20 to 40 yards above the ground}
Group make-up:
Solo-able at level 80
Addon:
Prat 3.0 - Set whisper sound to chime
Macro:
/tar time
/tar vyragosa
/stopmacro [noexists]
/w YOURNAME >>%t!!<<
Note: There's an addon out there called _npcscan that essentially does the same job as Prat + macro, but does it automatically.
Reagents:
Snowfall lager
The strat:
1. Park your toon over the Bor's Breath waterfall (southwest of Temple of storms and southeast of Valkyrion) and have your macro mapped to a key board key.
2. Make sure your game sounds are enabled and the volumn is turned up so you can hear Prat 3.0 chime when you get a whisper.
3. Find something else to do. You will likely spend hours in that one spot, smashing one keyboard button, and not seeing any results, so watching TV, listening to music, reading, etc... will all help pass the time (and keep you sane). Just remember to keep spamming that macro and to hustle to your pc when that chime goes off.
4. Engage TLPD as quickly as possible. This usually means flying right at it, using an instant cast range ability and then popping your snowfall lager so you don't fall to your death. Once engaged, kill it quickly because there will likely be some other toons (from the other faction) in the area who will not hesitate to gank you and steal your kill.
5. Loot!
The reward:

Reins of the Time-Lost Proto-Drake
My personal time lost:
+32 hours {and counting}
{1st Vyragosa kill at 3:18p server time (Bor's Breath)}
{2nd Vyragosa kill at 7:51p server time (Brunnhildar)}
{3rd Vyragosa kill at 3:13p server time (Bor's Breath)}
{4th Vyragosa kill at 8:22p server time (Bor's Breath)}
Time-Lost Proto-Drake
Known flight paths:
Storm Peaks
Spawn times:
Time-Lost Proto-Drake appears to share spawn timers with Vyragosa, another rare spawn monster in Storm Peaks. There are multiple reports putting the spawn time anywhere from every 6 hours to +1 day for Vyragosa, and a 1 in 16 chance of Time-Lost Proto-Drake spawning in her place.
Camp spot:
Over the Bor's Breath waterfall southeast of Valkyrion village. {TLPD flies roughly 20 to 40 yards above the ground}
Group make-up:
Solo-able at level 80
Addon:
Prat 3.0 - Set whisper sound to chime
Macro:
/tar time
/tar vyragosa
/stopmacro [noexists]
/w YOURNAME >>%t!!<<
Note: There's an addon out there called _npcscan that essentially does the same job as Prat + macro, but does it automatically.
Reagents:
Snowfall lager
The strat:
1. Park your toon over the Bor's Breath waterfall (southwest of Temple of storms and southeast of Valkyrion) and have your macro mapped to a key board key.
2. Make sure your game sounds are enabled and the volumn is turned up so you can hear Prat 3.0 chime when you get a whisper.
3. Find something else to do. You will likely spend hours in that one spot, smashing one keyboard button, and not seeing any results, so watching TV, listening to music, reading, etc... will all help pass the time (and keep you sane). Just remember to keep spamming that macro and to hustle to your pc when that chime goes off.
4. Engage TLPD as quickly as possible. This usually means flying right at it, using an instant cast range ability and then popping your snowfall lager so you don't fall to your death. Once engaged, kill it quickly because there will likely be some other toons (from the other faction) in the area who will not hesitate to gank you and steal your kill.
5. Loot!
The reward:
Reins of the Time-Lost Proto-Drake
My personal time lost:
+32 hours {and counting}
{1st Vyragosa kill at 3:18p server time (Bor's Breath)}
{2nd Vyragosa kill at 7:51p server time (Brunnhildar)}
{3rd Vyragosa kill at 3:13p server time (Bor's Breath)}
{4th Vyragosa kill at 8:22p server time (Bor's Breath)}
Tuesday, February 2, 2010
Healing on the run: Gunship Battle

Gunship Battle (Image courtesy of bosskillers.com)
Healing on the enemy ship:
Where to stand -
If you're assigned to heal on the enemy ship, stand on the edge within boarding range, do your best to avoid fire from the big guns, and don't forget to equip your rocket pack (available from the goblin NPC on board).
Note: As of 3.3.1 the rocket pack will shift you out of tree form when used.
What to watch for -
1. Below Zero! When the battle-mages cast this spell, your gunship's cannons will freeze (which means you will no longer be doing damage to the enemy ship). That's the queue for you and your boarding party to hop on over and put those mages out of commission. Be sure to WAIT for your tank to board first or else you'll aggro Muradin/Saurfang.
2. Battle Fury! Battle Fury is a stacking debuff that will increase the damage done to your tank by 10% for each stack. This will make reboarding your own ship a bit tricky as your tank will be taking big damage while you're rocketing through the air. Make sure you have a full set of HoTs on your tank before you jump ship. You should be able to get a swiftmend off in mid air.
Note: Use the enemy portal to reboard your ship whenever it's available. The portal will spawn behind Muradin/Saurfang.
3. Cleave. Inflicts 110% weapon damage on up to three targets in front of Muradin/Saurfang. If anyone other than the tank is being hit by this ability, something is going seriously wrong.
4. Rocket Artillery. - While your ship is firing at the enemy, their cannons will be doing the same. If you see a large targeting circle appear under you while you wait to board... move. You're given plenty of warning so there really is no excuse for getting hit by enemy fire.
5. Enemy Riflemen. - These little buggers will shoot at random targets in their range and you will likely take some gun fire as you're standing on the edge waiting to rocket across. There isn't much you can do about it other than take solice in the fact that they do not hit very hard. If you're targeted and have some time, feel free to move out of their range.
Healing on your own ship:
Where to stand -
If you're assigned to heal on your own ship, stand back from the edge and out of range of enemy fire. Be sure not to stand near the enemy portal when it appears on your deck.
What to watch for -
1. Enemy Portal! - The enemy boarding party will use a portal to arrive on your ship. Pay attention to where it spawns and get far away from it. Also, give your tank some time to gain aggro before you start renewing HoTs. Playing nice with your tank will make this part of the fight much easier to heal.
2. Bladestorm! - This ability inflicts damage on up to 4 targets every second for six seconds. Keep an eye on your melee group and be sure to stay far away as possible from the action.
3. Wounding Strike! - Inflicts 200% weapon damage and reduces all healing done to the target by 25% for 10 seconds. Hopefully only your tank will be hit by these, which will make healing through it rather easy.
4. Ranks. - The longer an enemy unit is allowed to live, the larger the buff they will get from their rank. Every 20 seconds they will gain a rank increasing their damage and attack speed. This means that you're job as heals will get more difficult the longer each fight goes on. Don't allow yourself to get complacent if there is very little damage to heal early on.
Summary -
This fight is one of the most fun in the game. It's typical tank and spank stuff and usually only dangerous when transitioning from ship to ship. Have fun with it!
Tuesday, January 26, 2010
And Drama was its name-o
Freshman year of college, my communications prof. told me never to begin a talk with an apology. (He used the word ‘talk’ because “only actors and politicians give speeches”.) Ironically, he would greet us every Tues. and Thurs. morning with “Sorry I’m late…” (Not kidding.)
Immediately after comm. 101 I’d spend an hour and fifteen minutes with my creative writing Prof., who similarly advocated the staunch rules of her trade. “Never begin an essay with a direct quote or a hypothetical” she’d say. I often wondered if I was in her class because of my response to the question “If you could have dinner with any four people…” on my college application… or in spite of it.
Regardless, none of that is relevant to the subject of this post… other than to prove I was paying attention should either one of my former professors read this next line (which was originally going to be the start of this blog).
“I’m sorry, but is a melee weapon ever really a main spec roll for a ranged character?” Those words crackled over vent and may as well have been “Let’s get ready to rumble”! The torrent of expletives, ‘yea buts’, and ‘I nevers’ that followed would have made any school yard proud.
The situation: Frost Giant’s Cleaver dropped after the Gunship Battle in ICC and a PuG hunter out rolled all melee characters for it.
The argument: This one handed ax should go to a melee toon because “To a hunter it’s only stats. To a melee character it’s stats plus most of their damage.”
The rebuttal: “My hunter friend told me to get this ax and he’s top 15 on this server.”
The result: A ‘forget you’ for the hunter and master loot the weapon to the highest melee roll.
The question: Was justice done here?
I ask because I feel a party to said incident by silently believing that PuG hunter would simply toss aside the one hander as soon as a hunter two-hand wep dropped.
As a resto druid, I know very little about melee dps or hunter weapons, so I felt the need to do a little research on the question at hand. (Very little research, as it turns out, because websense has been all up in my grill lately.) From what I’ve seen and read, A. there are very few two-handed stat sticks for Hunters in ICC, B. Dual wielding Frost Giant's Cleaver blows away any level 251 two hander currently available to hunters, and C. It seems the current BiS hunter weapons are in fact dual wielded axes (albeit not the ax in question). Now, it sounds to me like PuG hunter may have gotten the shaft here.
Then again, maybe not. BiS or not, a hunter rolling on melee weapons is a bit like a rogue rolling on bows/cross bows, right? I mean, it IS just stats and probably won't see a lick of use once equipped. The class that actually uses the wep certainly gets a hell of a lot more out of it.
So I'm torn. Part of me believes PuG hunter won a roll for a main spec upgrade but didn't get his loot, which is unfair. The other part thinks PuG hunter should have acquiesced and let the melee wep go to the melee toon... instead of putting my guild on blast in trade (which is never cool, imo).
/Sigh. D.R.A.M.A.
Sunday, January 24, 2010
HealBot 3.3.0 (setup 3)
Welcome to the third (and final) installment of the HealBot 3.3.0 setup guide. Here we will walk through the final three tabs of the HealBot options menu. (A walk through of the General and Spells tabs can be found in Part 1 of this guide, while Part 2 deals exclusively with the Skins tab.)
First up is the Cure tab. It's here that you can setup HealBot to monitor removable debuffs on your party and raid members. This is essential for raiding resto druids, as cleansing poisons and removing curses are an important job to perform. Take a look at my setup below.

Monitor to remove debuffs: Toggles debuff monitoring on and off. This option should be enabled at all times.
Spell to remove debuffs: By entering your cleansing spells here, HB will monitor your raid and alert you (by changing raid bar colors) when a debuff can be removed by one of these spells.
Ignore debuffs: You can set HB to ignore specific debuffs that may not be worth the time it would take to remove them (such as non harmful and short duration debuffs). Checking off 'By class' will ignore things such as mana effect debuffs on classes that use energy or rage, etc...
Custom/New debuff: This option allows HB to notify you of specific non-removable debuffs that you may want to be made aware of in certain boss encounters (such as Ignis' slag pot or Marrowgar's Graveyard bone spike).
Bar colours: Change a raid members bar to this color when affected by a debuff. The bar colors can be changed to your preference.
Debuff warnings: Options to receive warnings other than bar color changes when a raid member is affected by a debuff.
This screen, combined with mapping your cleansing spells to your mouse buttons, make HB a powerful and effective tool for removing debuffs. Like I said earlier, this is essential for all raiding resto druids.
Next up is the Buffs screen. This screen will allow you to monitor your raid buffs and alert you to any group members who may be missing them.

Monitor for missing buffs: Toggles buff monitoring on and off.
Spell to buff: Tell HB which buff to monitor.
Check members: Tell HB which raid members to monitor for missing buffs.
Bar colours: Adjust bar color to your preference.
Show buff before it expires: Tell HB to show your buffs as expired once the time remaining on their duration falls below a certain level. Use the sliders to define when you would like this to occur.
And finally, we come to the Tips tab. Tooltips are very useful when you first start healing with this addon (especially if you're still learning where your spells are mapped). This screen controls what information is displayed on those tool tips. Check it out.

Show tooltips: Enabling this option will show a tooltip whenever you mouse over a raid bar. This tooltip shows you which spells you have mapped to each mouse action.
Constantly update: When this is enabled, the information on the tooltip will continue to update while you stay moused over a raid bar.
Hide tooltip in combat: Choose whether or not to have tooltips appear while you are in combat.
Show target information: Enabling this option will show your target's name, class, spec, location, and health.
Show my buffs: This option will display what buffs you have active and how much time is remaining on those buffs.
Show detailed spell information: Enabling this option will show you information about each spell currently mapped to your mouse buttons... such as the spell's cast time, how much it will heal for (direct spells), how long it will last (heal over time spells) as well as the bonus it receives from your current spell power rating.
- Note: You likely won't have time to look at this information during an encounter, but it is helpful in revealing how your spells are affected by new gear or changes in your build. I recommend disabling this option before combat, however, as this added information does make the tooltip rather large.
Show heal overtime recommendation: HB will recommend which HoT to cast and which mouse button will cast it.
Show predefined combos: Shows you the predefined button combations to enable/disable HB, add/remove raid bars to MyTargets, and add/remove raid bars to the black list.
Position tooltip: Choose where you want your tooltips to appear on your UI.
Opacity: Adjust the opacity of your tooltips.
At the bottom of every option screen you will find 5 buttons.
Info: Displays version info, incoming heal information, as well as addon CPU and comms usage.
ResetHB: Resets HealBot to your last saved settings. (HealBot automatically saves your settings when you close the options menu).
ReloadUI: Reloads your user interface.
Defaults: Returns HB to the default setting
Close: Exits the options menu.
And that, my friends, is probably more than you'll ever need to know about HealBot 3.3.0. I hope you've found this walk through useful, and if you have any questions about HB or this guide feel free to leave a comment or send and email to twigheals@gmail.com.
As always, thanks for reading, and have fun out there!
First up is the Cure tab. It's here that you can setup HealBot to monitor removable debuffs on your party and raid members. This is essential for raiding resto druids, as cleansing poisons and removing curses are an important job to perform. Take a look at my setup below.
Monitor to remove debuffs: Toggles debuff monitoring on and off. This option should be enabled at all times.
Spell to remove debuffs: By entering your cleansing spells here, HB will monitor your raid and alert you (by changing raid bar colors) when a debuff can be removed by one of these spells.
Ignore debuffs: You can set HB to ignore specific debuffs that may not be worth the time it would take to remove them (such as non harmful and short duration debuffs). Checking off 'By class' will ignore things such as mana effect debuffs on classes that use energy or rage, etc...
Custom/New debuff: This option allows HB to notify you of specific non-removable debuffs that you may want to be made aware of in certain boss encounters (such as Ignis' slag pot or Marrowgar's Graveyard bone spike).
Bar colours: Change a raid members bar to this color when affected by a debuff. The bar colors can be changed to your preference.
Debuff warnings: Options to receive warnings other than bar color changes when a raid member is affected by a debuff.
This screen, combined with mapping your cleansing spells to your mouse buttons, make HB a powerful and effective tool for removing debuffs. Like I said earlier, this is essential for all raiding resto druids.
Next up is the Buffs screen. This screen will allow you to monitor your raid buffs and alert you to any group members who may be missing them.
Monitor for missing buffs: Toggles buff monitoring on and off.
Spell to buff: Tell HB which buff to monitor.
Check members: Tell HB which raid members to monitor for missing buffs.
Bar colours: Adjust bar color to your preference.
Show buff before it expires: Tell HB to show your buffs as expired once the time remaining on their duration falls below a certain level. Use the sliders to define when you would like this to occur.
And finally, we come to the Tips tab. Tooltips are very useful when you first start healing with this addon (especially if you're still learning where your spells are mapped). This screen controls what information is displayed on those tool tips. Check it out.
Show tooltips: Enabling this option will show a tooltip whenever you mouse over a raid bar. This tooltip shows you which spells you have mapped to each mouse action.
Constantly update: When this is enabled, the information on the tooltip will continue to update while you stay moused over a raid bar.
Hide tooltip in combat: Choose whether or not to have tooltips appear while you are in combat.
Show target information: Enabling this option will show your target's name, class, spec, location, and health.
Show my buffs: This option will display what buffs you have active and how much time is remaining on those buffs.
Show detailed spell information: Enabling this option will show you information about each spell currently mapped to your mouse buttons... such as the spell's cast time, how much it will heal for (direct spells), how long it will last (heal over time spells) as well as the bonus it receives from your current spell power rating.
- Note: You likely won't have time to look at this information during an encounter, but it is helpful in revealing how your spells are affected by new gear or changes in your build. I recommend disabling this option before combat, however, as this added information does make the tooltip rather large.
Show heal overtime recommendation: HB will recommend which HoT to cast and which mouse button will cast it.
Show predefined combos: Shows you the predefined button combations to enable/disable HB, add/remove raid bars to MyTargets, and add/remove raid bars to the black list.
Position tooltip: Choose where you want your tooltips to appear on your UI.
Opacity: Adjust the opacity of your tooltips.
At the bottom of every option screen you will find 5 buttons.
Info: Displays version info, incoming heal information, as well as addon CPU and comms usage.
ResetHB: Resets HealBot to your last saved settings. (HealBot automatically saves your settings when you close the options menu).
ReloadUI: Reloads your user interface.
Defaults: Returns HB to the default setting
Close: Exits the options menu.
And that, my friends, is probably more than you'll ever need to know about HealBot 3.3.0. I hope you've found this walk through useful, and if you have any questions about HB or this guide feel free to leave a comment or send and email to twigheals@gmail.com.
As always, thanks for reading, and have fun out there!
Saturday, January 23, 2010
HealBot 3.3.0 (setup 2)
Welcome to part 2 of the HealBot 3.3.0 setup guide. Here I will show you how you can adjust the look and feel of your new addon by using the Skins tab from the options menu.
The first order of business is to select which skin you want to start with. There are several options to choose from so check them all out using the test bars to see which skin appeals to you most. (You may also create your own using the "New skin" option.)
Once you have the skin selected, you can begin customizing the skin by using the 8 buttons at the top of the screen. Let's take a look at the General screen first.

Background/Border: You can mouse click on the word background and/or border to adjust the color scheme of your addon.
Lock Position: This options will lock your health bars in place preventing you from accidentally moving them during an encounter.
Anchor: Setting the anchor point from the drop down menu will cause HealBot to grow out from that point.
Close automatically: This option will cause the addon to close on its own when you are out of combat.
Play sound on open: Plays a sound when HealBot opens.
Hide party frames: This option will remove all character portraits and party frames from your UI while HealBot is enabled.
Disable bar when range over 100 yards: HealBot will remove a group member's health bar from the UI if he/she is more than 100 yards away from your character. (This can be useful in fights similar to Thorim)
Monitor aggro: This option allows HealBot to track your group members aggro. It will notify you if a dps'er pulls aggro or is targeted by an add. It's extremely useful in a raid setting.
Highlight active bar: This option will highlight a health bar on your UI when your mouse if hovering over it. It's useful in helping to avoid mis-clicks.
Use fluid bars: HealBot will update the health bars on your UI in a fluid motion. Only consider enabling this setting if you have no performance issues with your PC.
Skin default for: You can set HealBot to use a different skin when you're soloing, in a party, raid group, BG, etc.
Next up is the Healing screen. This is where you will choose how your raid member's health bars will be grouped on your UI. Check it out.

Healing bars: Checking off these boxes will add groups to your UI for things like main tanks, pets, your targets, and even vehicles. Play around with it when deciding what your preferences are.
Target bar: HealBot will add a health bar to your UI for whomever you have targeted. Useful for things like keeping track of Arthas in CoS or paying extra close attention to a marked raid member in the Deathbringer Saurfang encounter.
Alert level: This setting tells HealBot at what percentage hp you would like to be notified that a group member needs heals. The lower the percentage, the more damage a character must take before you are alerted.
Show raid bars for: This option will show raid bars for any character class of your choosing. 'All classes' should be selected when entering any kind of encounter.
Include raid groups: You can choose which raid groups will appear on your HealBot UI. Helpful if you're assigned to heal a certain group, though ultimately it's best to have all raid members appear on your screen.
Sort raid bars by: This option allows you to adjust the order in which the raid bars appear on your UI.
Also sub sort: You can also sort the order in which the raid bars appear in each subcategory.
This next screen controls when you will be alerted to incoming heals from other healers in your raid group. You can adjust the sliders to change the minimum duration of direct, HoT and channelled spells of which you wish to be notified. (See below.)

The Chat screen is next and it affects what information you're broadcasting and to whom. You can choose to notify the entire raid of every spell you are casting (I recommend you don't) or you can choose not to notify anyone at all. The only option I would consider here is notifying the raid of who I am resurrecting (to avoid any waisted battle rez). The choice, as always, is yours.

Once you have your notifications set, its back to customizing the look of your UI. The Headers screen allows you to change the appearance of the group headers on your HealBot screen. You can change header bar and text color, font size, header height and width, or turn off the headers completely. (See below.)

Now we get to the meat and potatoes of the skins menu. The Bars screen is where you affect how your raid bars appear on your UI. Take your time here, as this is where you will set the visual queues you will be reacting from in your raids. Check them out...

Texture: The general appearance of your raid bars. The can be squared, rounded, textured, etc... all based according to your taste.
No. groups per column: This controls how many groups will appear in each column on your UI. Use this to control the layout of your UI.
Height/Width: Adjust the size of each raid bar on your UI. The larger they are, the easier it will be to see things like names, health, current HoTs, etc. However, larger bars will also cover more of the game screen. Use your best judgement.
Row/Column spacer: This affects how much space is between each row and column of your UI.
Enabled/Disabled Opacity: This setting will adjust the opacity of raid bars that are enabled (pulling aggro, needing heals, etc...) or disabled (having enough hp to be above the alert setting). Having a stark contrast between enabled and disabled bars will help you easily see who is in need of heals and who is not.
Incoming heals opacity: Adjust the opacity of the incoming heal notification.
Out of range opacity: Adjust the opacity of all raid members who are out of healing range.
Aggro/Mana bar size: You can choose to have aggro bars and mana bars appear above each raid frame on your UI. This setting will adjust how large or small those bars will appear.
Color bar by: You can choose to have different color raid bars for each class or for each role (ranged, melee, etc...)
After setting up the raid bars to look the way you like, you can change how the text appears on each one of those bars in this next screen.

Color text by class: Each class will have their own colored font on their raid bars.
Show class on bar: You can choose to have each raid bar labeled with each players class via text or an icon.
Show name on bar: Have each player's name appear on their corresponding raid bar.
Double text lines: Have two lines of text appear on each raid bar.
Show health on bar as: These settings allow you to adjust if and how a players health appears on their corresponding raid bar.
Text alignment: Adjust where the text appears on each raid bar.
Font/Size/Color: Change the font on each raid bar.
And last, but certainly not least, is the Icon screen. Resto druids love this screen because it allows us to display our pre-existing HoTs on each raid bar and how much time they have left on their duration. Take a look...

Show HoT icons: Toggle between showing and hiding your HoT icons on each raid bar.
Show debuff icon: Toggle between showing and hiding a debuff icon on the raid bars for any raid members who are afflicted. (Useful when 'count' is enabled under the 'show icon text' option as you will be able to see all stackable poisons and how many ticks of abolish poison you will need to cure it.)
Show Raid icon: Will dispaly a skull, circle, star, etc... on the raid bar of any toon who is tagged with a raid icon. Very helpful when used with deadly boss mods.
Icon position: Controls where your icons will appear on the raid bars.
Show icon text: Allows HealBot to display how much time is remaining on a spell (or debuff) as well as the number of stacks each spell (or debuff) has.
Icon/Icon text scale: Adjust the size of each icon and their text.
Druid options: This option allows you to control which helpful spells will appear as an icon on your raid bars.
Okay, time to take a break. If you've made it this far then your addon is fully customized and ready to go. Congratulations! However, I promise you that you'll want to come back for Part 3 of the HealBot 3.3.0 setup, because that is where we'll discover HealBot's version of decursive. :-D
See you soon.
The first order of business is to select which skin you want to start with. There are several options to choose from so check them all out using the test bars to see which skin appeals to you most. (You may also create your own using the "New skin" option.)
Once you have the skin selected, you can begin customizing the skin by using the 8 buttons at the top of the screen. Let's take a look at the General screen first.
Background/Border: You can mouse click on the word background and/or border to adjust the color scheme of your addon.
Lock Position: This options will lock your health bars in place preventing you from accidentally moving them during an encounter.
Anchor: Setting the anchor point from the drop down menu will cause HealBot to grow out from that point.
Close automatically: This option will cause the addon to close on its own when you are out of combat.
Play sound on open: Plays a sound when HealBot opens.
Hide party frames: This option will remove all character portraits and party frames from your UI while HealBot is enabled.
Disable bar when range over 100 yards: HealBot will remove a group member's health bar from the UI if he/she is more than 100 yards away from your character. (This can be useful in fights similar to Thorim)
Monitor aggro: This option allows HealBot to track your group members aggro. It will notify you if a dps'er pulls aggro or is targeted by an add. It's extremely useful in a raid setting.
Highlight active bar: This option will highlight a health bar on your UI when your mouse if hovering over it. It's useful in helping to avoid mis-clicks.
Use fluid bars: HealBot will update the health bars on your UI in a fluid motion. Only consider enabling this setting if you have no performance issues with your PC.
Skin default for: You can set HealBot to use a different skin when you're soloing, in a party, raid group, BG, etc.
Next up is the Healing screen. This is where you will choose how your raid member's health bars will be grouped on your UI. Check it out.
Healing bars: Checking off these boxes will add groups to your UI for things like main tanks, pets, your targets, and even vehicles. Play around with it when deciding what your preferences are.
Target bar: HealBot will add a health bar to your UI for whomever you have targeted. Useful for things like keeping track of Arthas in CoS or paying extra close attention to a marked raid member in the Deathbringer Saurfang encounter.
Alert level: This setting tells HealBot at what percentage hp you would like to be notified that a group member needs heals. The lower the percentage, the more damage a character must take before you are alerted.
Show raid bars for: This option will show raid bars for any character class of your choosing. 'All classes' should be selected when entering any kind of encounter.
Include raid groups: You can choose which raid groups will appear on your HealBot UI. Helpful if you're assigned to heal a certain group, though ultimately it's best to have all raid members appear on your screen.
Sort raid bars by: This option allows you to adjust the order in which the raid bars appear on your UI.
Also sub sort: You can also sort the order in which the raid bars appear in each subcategory.
This next screen controls when you will be alerted to incoming heals from other healers in your raid group. You can adjust the sliders to change the minimum duration of direct, HoT and channelled spells of which you wish to be notified. (See below.)
The Chat screen is next and it affects what information you're broadcasting and to whom. You can choose to notify the entire raid of every spell you are casting (I recommend you don't) or you can choose not to notify anyone at all. The only option I would consider here is notifying the raid of who I am resurrecting (to avoid any waisted battle rez). The choice, as always, is yours.
Once you have your notifications set, its back to customizing the look of your UI. The Headers screen allows you to change the appearance of the group headers on your HealBot screen. You can change header bar and text color, font size, header height and width, or turn off the headers completely. (See below.)
Now we get to the meat and potatoes of the skins menu. The Bars screen is where you affect how your raid bars appear on your UI. Take your time here, as this is where you will set the visual queues you will be reacting from in your raids. Check them out...
Texture: The general appearance of your raid bars. The can be squared, rounded, textured, etc... all based according to your taste.
No. groups per column: This controls how many groups will appear in each column on your UI. Use this to control the layout of your UI.
Height/Width: Adjust the size of each raid bar on your UI. The larger they are, the easier it will be to see things like names, health, current HoTs, etc. However, larger bars will also cover more of the game screen. Use your best judgement.
Row/Column spacer: This affects how much space is between each row and column of your UI.
Enabled/Disabled Opacity: This setting will adjust the opacity of raid bars that are enabled (pulling aggro, needing heals, etc...) or disabled (having enough hp to be above the alert setting). Having a stark contrast between enabled and disabled bars will help you easily see who is in need of heals and who is not.
Incoming heals opacity: Adjust the opacity of the incoming heal notification.
Out of range opacity: Adjust the opacity of all raid members who are out of healing range.
Aggro/Mana bar size: You can choose to have aggro bars and mana bars appear above each raid frame on your UI. This setting will adjust how large or small those bars will appear.
Color bar by: You can choose to have different color raid bars for each class or for each role (ranged, melee, etc...)
After setting up the raid bars to look the way you like, you can change how the text appears on each one of those bars in this next screen.
Color text by class: Each class will have their own colored font on their raid bars.
Show class on bar: You can choose to have each raid bar labeled with each players class via text or an icon.
Show name on bar: Have each player's name appear on their corresponding raid bar.
Double text lines: Have two lines of text appear on each raid bar.
Show health on bar as: These settings allow you to adjust if and how a players health appears on their corresponding raid bar.
Text alignment: Adjust where the text appears on each raid bar.
Font/Size/Color: Change the font on each raid bar.
And last, but certainly not least, is the Icon screen. Resto druids love this screen because it allows us to display our pre-existing HoTs on each raid bar and how much time they have left on their duration. Take a look...
Show HoT icons: Toggle between showing and hiding your HoT icons on each raid bar.
Show debuff icon: Toggle between showing and hiding a debuff icon on the raid bars for any raid members who are afflicted. (Useful when 'count' is enabled under the 'show icon text' option as you will be able to see all stackable poisons and how many ticks of abolish poison you will need to cure it.)
Show Raid icon: Will dispaly a skull, circle, star, etc... on the raid bar of any toon who is tagged with a raid icon. Very helpful when used with deadly boss mods.
Icon position: Controls where your icons will appear on the raid bars.
Show icon text: Allows HealBot to display how much time is remaining on a spell (or debuff) as well as the number of stacks each spell (or debuff) has.
Icon/Icon text scale: Adjust the size of each icon and their text.
Druid options: This option allows you to control which helpful spells will appear as an icon on your raid bars.
Okay, time to take a break. If you've made it this far then your addon is fully customized and ready to go. Congratulations! However, I promise you that you'll want to come back for Part 3 of the HealBot 3.3.0 setup, because that is where we'll discover HealBot's version of decursive. :-D
See you soon.
Friday, January 22, 2010
HealBot 3.3.0 (setup 1)
Still believed by most to be the easiest healing addon to use "out of the box", HealBot 3.3.0 is a must have for any new raiding resto druid. This guide will walk you through the HealBot setup screens one by one and hopefully help you understand and customize your shiny new addon. If you don't have HealBot 3.3.0 installed yet, you can download it here.


Now that you have the basics taken care of, it's time to customize the addon to fit your healing style. In the Spells tab you will map all of your helpful spells to your mouse buttons. It's this functionality (along with the organization of your raid frames) that make healing addons a must have for raiding druids. All of your heals will soon be a single mouse click away, and its here (in the second tab) that you decide which buttons to map your spells to.

Note: You may choose to stick with HealBot's default settings here and simply get used to it's default mapping. However, I recommend playing around with it and discovering what mappings work best for your healing style.
Once you locate your healbot options button on your minimap, clicking on it will bring you to the screen below. This is the General tab of the HealBot options menu where you can control how you interact with HealBot from your UI (user interface). Have a look.
Most of the options here are self explanatory, but I've compiled a list of what they do so that there's no confusion. Feel free to play around with this tab if you like, however the default settings work perfectly well (which is part of the appeal to HealBot).
Disable HealBot: Disable all events and hide the bars. (This is the off switch)
Show minimap button: Display or hidethe HealBot icon on your minimap. Hold down right click to move.
Show minimap button: Display or hidethe HealBot icon on your minimap. Hold down right click to move.
Hide option button: Display or hide the option button on your HealBot frame.
Right click opens options: Right clicking on your HealBot frame will open the options screen. I recommend disabling this option because you will likely have a healing spell mapped to your right mouse click and you do not want your options screen popping up accidentally during an encounter.
Enable LibQuickHealth: LibQuickHealth is a mod that allows your addon to use combat log events and information to adjust the character's hp values on your healing addon faster than the server normally would.
Use CPU profiler (Addons CPU usage info): Enabling this option allows HealBot to monitor how much processing power your addons are using. You may want to enable this option if you're pushing the limits of your CPU's capabilities.
Range check frequency: This controls how often HealBot will do a range check on your raid. The lower the setting the faster you will know if someone moved out of your range.
Test bars on/off: This button will show or hide test bars on your UI. I suggest turning the test bars on during the setup process so you can see how each change in options you make will affect the look of the healbot interface on your screen (see test bar image above).
Number of MyTargets: Allows you to control of number of MyTargets you show on your healbot interface. MyTargets allow you to chose specific characters in your party/raid to keep a closer eye on (by grouping them together). Ctrl+Alt+Right click on a health bar to toggle a character to and from your MyTargets group.
Configure classes for: This allows you to choose which character classes healbot will consider ranged, melee, healers, or custom in the buffs tab. (This option is more useful for classes with more complicated buff assignments)
Now that you have the basics taken care of, it's time to customize the addon to fit your healing style. In the Spells tab you will map all of your helpful spells to your mouse buttons. It's this functionality (along with the organization of your raid frames) that make healing addons a must have for raiding druids. All of your heals will soon be a single mouse click away, and its here (in the second tab) that you decide which buttons to map your spells to.
You'll notice at the top of this tab that you can have HealBot enabled all the time or only during combat (drop down image). I recommend having it enabled at all times so that you grow used to the addon and where your spells are mapped. The biggest obstacle you'll face with HealBot is learning its new method of casting.
Immediately below the first drop down menu is where you will toggle between options screens for your left, middle, and right mouse buttons (as you'll see in the drop down image, you can map up to ten buttons if your mouse supports it).
Note: You may choose to stick with HealBot's default settings here and simply get used to it's default mapping. However, I recommend playing around with it and discovering what mappings work best for your healing style.
As you see above (image) you will be using shift, ctrl, and alt along with your mouse clicks to cast your various spells. For example, under the 'left' menu in the 'alt+click' field I have entered Regrowth. This means when I mouse over one of the health bars on my UI, I have to hold down the 'Alt' key and use the left mouse button in order to cast Regrowth on that target. (Or put more simply, alt+left click = Regrowth.)
If I change the menu from 'left' to 'middle' I can enter a different spell, such as Lifebloom, in the 'alt+click' field and that will make alt+middle click = Lifebloom. The process is repeated for every combination of shift, alt, or ctrl + left, middle, or right click (12 spells total).
This may all seem complicated on paper, but once your spells are mapped, casting them in this method will become instinctive.
Some other options available on this screen are as follows:
Auto Target: You will automatically target the character you are casting a certain spell on, bringing up their character portrait at the top of your game screen (if you have not disabled them).
Auto Trinket: If you are wearing trinkets (such as Talisman of Resurgence) that have a 'use' ability that you would like to activate before the casting of a certain spell, you can check off the trinket slot you have it equipped in next to the spell you would like to have activate it and it will be triggered automatically.
Cast when button is: You can choose to have your spell casts occur when your mouse button is pressed or when it is released... whichever is your preference.
Smart cast when out of combat: This option allows HealBot to choose the spell to cast on a target when you are out of combat. If someone in your raid has a debuff or needs to be resurrected, simply pressing left click will have HealBot perform the appropriate action.
Avoid accidental PVP: Checking off this option will have HealBot alert you if casting a helpful spell on one of your group members will cause you to be flagged for PVP.
That concludes part 1 of the HealBot 3.3.0 setup. At this point you are more than ready to start healing with your addon. All of your spells are now at your finger tips, so get out there and practice using it. I promise you it won't take long for you to get accustomed to your button mappings.
Part 2 of the HealBot 3.3.0 setup will focus on altering how the addon looks and what information it portrays on the health bars, so stay tuned.
Thursday, January 21, 2010
Resto Druid Haste "Cap"
Back in June I blogged about GotE and how I felt it may not be worth the 5 talent points it requires. My opinions left me alone in the woods, so to speak, as most everybody else was singing the praises of the resto druid haste “cap”. Oh well… C’est la vie… to each his own… it takes different strokes… etc... etc... Stubbornly, my build left GotE on the cutting room floor and life went on (as it tends to do).
Then, something wonderful happened. Patch 3.3 came along, and with it came a change to GotE! Now, instead of only reducing the GCD on 3 measly spells, Gift of the Earthmother increases our haste rating by up to 10% on ALL casts! That’s pretty sweet, if you ask me… although nobody did. With this patch I changed my build, spent my 5 talent points, and joined the ranks of druids everywhere singing the praises of the Earthmother’s generous gift… or so I thought.
Surfing the interwebs, dropping in to see my favorite bloggers, and popping over to elitist jerks to check out the math, I started to notice a trend. People weren’t as excited about the change as I was… not even close. The word ‘nerf’ actually showed up a few times in the same sentence as GotE, and instinctively my head shook out the question “why?” How could a straight haste buff be worse than a silly little GCD cooldown on three spells?
The culprit was that damned haste “cap” everybody was so in love with pre-3.3. It had gone up… way up… to over 800 to be exact (including raid buffs). Now, I’m not one to take pleasure in other people’s suffering, but, when I saw the number ‘856’, part of me smiled and thought “woo hoo the haste cap is out of reach so I won’t have to hear about it anymore.”
Reality check. Not only was the haste cap very much in reach, but people actually started gemming for it… even re-speccing for it! Has the world gone crazy?
In a word, yes… at least in my opinion (which will most certainly land me in the minority again). Celestial Focus, the talent which gives 3% more haste to a boomkin (lowering the haste cap to 735 for resto druids), is 18 points deep in the balance tree. That means to get it, we must take at least 4 points out of our current builds (I would have to move 7 points) and give up some VERY good talents in the resto tree (talents like Living Seed and Empowered Touch) in the process. Needless to say, it’s quite the endeavor to reach the haste “cap” and I can’t help but believe that it’s not really worth it.
Look at it this way, giving up spell power and crit (if you’re gemming for haste) and knocking down the healing power of Nourish and Healing Touch (two spells you likely use in dire situations and should want to heal as big as possible) just to be able to toss a Rejuv on two more toons before your first Rejuv wears off seems ludicrous to me.
I personally have no problem HoTing up an entire 10 man or half of a 25 with my current haste rating (610). More haste would obviously have a positive affect on my casting speed, but it would also have a negative affect on my casting power where it’s need most (single target damage spikes).
I'm not saying haste is bad (it's not). I'm not sayin crit is better (it isn't). What I am saying is you should not stack haste at the expense of your build and your other stats. If you have the choice between two pieces of gear and the decision boils down to haste vs. crit THEN you can talk about "caps", GCDs, and such. But if you're standing in Dal, looking at your character screen trying to figure out if you have enough gem slots to get your haste rating over 700, you need to re-evaluate your stat priorities.
Wednesday, January 20, 2010
That's right woodchuck chuckers it's... Groundhog Day!

MMO-Champion is reporting that players will finally have their chance to go toe to toe with the Lich King on Groundhog Day, Feb 2nd!
Rumors that his enrage ability involves summoning Bill Murray to tell you bad joke after bad joke until you're forced to reset your PC and start the fight over... are unconfirmed.
With the end approaching rapidly, I find myself making some mental notes on what I want to accomplish with the down time before Cataclysm hits (whenever that will be)...
I never did get around to finishing all of the classic and BC raids. I'm pretty sure there are some quests in Org I'll want to finish before it goes kaput. I'd love to repair my cartel rep so I can go fishing in Booty Bay again. Etc...
How about you? I know I'm putting the cart before the horse here, but what's on your to-do list after you finish walking up and down Arthas' backside?
Tuesday, January 19, 2010
Healing on the run: Festergut

Festergut
Where to stand –
Where to stand –
Everyone except for ranged dps will stack together in melee range INCLUDING healers.
What to watch for –
1. Vile Gas! – This nasty little spell will cause its target to vomit uncontrollably (stunning them) and inflict a good amount of damage to anyone in the area. Festergut will cast this on 3 ranged targets (8 in 25 man). If there are not 3 (or 8) ranged targets to cast it on, the boss will cast this on the melee group, essentially wiping the raid. This spell makes raid healing extremely important. Make sure you’re giving constant attention to your ranged dps in this fight. If one of your ranged dps dies either a melee player or a healer will have to run out to take their place, which will make this fight much more difficult to win.
2. Enrage timer! – Festergut has a 5 minute enrage timer. Unlike other enrages, you won’t have an extra few seconds to dps while the boss runs around killing everybody one at a time. Festerguts enrage hits everyone at the same time, so you have exactly 5 minutes to dps him down or it’s a wipe. This is the reason why keeping everyone alive is so important. They call this fight a “dps check”, but healers will have to be on the ball as well if you’re going to get past this boss.
3. Pungent Blight! – After Festergut has cast three sets of gas spores (see below) he will cast pungent blight. This spell hits for 50k hp and is only survivable if you have the buff from the gas spores. Three stacks of inoculate will reduce the damage taken by 75%, resulting in a loss of roughly 12k hp to everyone in raid. You best get those HoTs rolling before this spell is cast.
4. Gas Spores. – The boss will cast 2 gas spores (3 in 25 man) on random characters throughout the fight. When they explode, everyone in range will gain a stacking buff called inoculate which increases resistance to blight (reducing the damage taken by 25% per stack). The exploding spores will do a little damage to all in range, but it’s not anything to worry about. What you do need to worry about is whether or not everyone is getting the buff. If both (or all three) spores are cast on the melee group then someone will have to bring their spore out to the ranged group and vice versa.
5. Gaseous Blight. – During this fight a cloud of gas fills the room doing damage to your entire raid. The damage done will decrease by 1/3 each time Festergut inhales the gas, but doing so will cause him to grow and do 30% more damage. After he inhales 3 times the gas will be released back into the room and the process will repeat. This mechanic causes an interesting shift in focus from raid to tank healing and back again. Regardless of who you are assigned to heal, pay attention to how much gas is in the room and adjust your healing priorities appropriately.
6. Gastric Bloat. - Festergut will cast this stackable debuff on the tank every 15 seconds causing 10k damage but also increasing the tank's damage done by 10%. At nine stacks the OT will taunt off or else the MT will explode (at 10 stacks). Watch for the tank swap and be prepared to heal the proper target.
Summary: As far as mechanics go, this is a simple “tank and spank” type of encounter with very little reason to ever move your character. This makes Festergut the easiest boss in the plagueworks, as long as you have the dps to beat the enrage timer. If you feel that you don’t have the numbers to beat it, give Rotface a try. The mechanics of his fight are much more complicated, but solid raid coordination can make up for a lack of burst dps.
Summary: As far as mechanics go, this is a simple “tank and spank” type of encounter with very little reason to ever move your character. This makes Festergut the easiest boss in the plagueworks, as long as you have the dps to beat the enrage timer. If you feel that you don’t have the numbers to beat it, give Rotface a try. The mechanics of his fight are much more complicated, but solid raid coordination can make up for a lack of burst dps.
Monday, January 18, 2010
Healing on the run: Deathbringer Saurfang

Where to stand – You should stay at max range for this fight. Do your best not to stand within 10 yards of another toon.
What to watch for –
1. Mark of the Fallen Champion! – Saurfang will cast this debuff on a random character when his blood power bar is filled. The affected character will take roughly 6k damage every time Saurfang does a melee attack throughout the remainder of the fight. Also, if the affected player dies this mark will heal Saurfang for 5% of this total health. The affect lasts through death, so if you battle rez the affected player and he/she dies again the boss will gain another 5% health. This ability is the reason your raid will work so hard to limit how much blood power the boss generates. If too many of these marks are cast, surviving this fight will eventually become impossible. Needless to say, healing a character with this debuff is a priority. DO NOT rez someone who has this mark.
2. Blood beasts! – These adds spawn next to the boss throughout the encounter (two at a time). Tanks will NOT pick these adds up because every time they land a melee attack Saurfang will gain Blood Power. For that reason, your ranged dps will aggro and then kite these beasts until they are killed. Use caution when these adds first spawn, as you will likely gain aggro before your dps can. Staying at max range will give your dps time to pull the beasts off you before they’re able to do damage. Also, don’t be afraid to help with crowd control (stomp/roots) if it looks like one of your kiters could use it.
3. Frenzy! - At 30% hp Saurfang will frenzy causing him to attack faster and generate blood power faster as well. If you can get the boss to frenzy before he’s able to cast his first mark, you’re raid is in great shape. If there’s already a mark on one of your raid members, however, your healers will have to coordinate who heals the first mark and who will heal the next. Saurfang’s frenzy is where healers have to step up, so if you were helping with CC, stop and get ready to heal big for the remainder of the fight. Remember that your priority is to keep players affected with mark of the fallen champion alive.
4. Rune of Blood. – The boss will leech 5k to 6k health and heal for 5 times that amount every time the affected target is hit with a melee attack. This ability is the reason your tanks will be taunting off one another. If you’re tank healing, pay attention to when this is cast so you’ll know when exactly Saurfang will be changing targets.
5. Boiling Blood. – This attack will make up the majority of your raid healing responsibilities (until the first MofFC is cast). Saurfang will cast this DoT on a random toon throughout the fight. It does a fair amount of damage (5k) every 3 seconds for 15 seconds and each tick gives blood power to the boss. It’s not difficult to heal through, although you will want to pay extra attention if it’s cast on one of your kiters (as they may also be taking some damage from blood beasts). If you’re assigned to raid heals, HoT up whoever has this DoT and then feel free to help your kiters CC those damn blood beasts.
Summary:
This fight is actually easier on 25 man than it is on 10 man, imo. With more dps to attack and CC blood beasts, the boss generates blood power slower in 25 man and therefore casts fewer marks. On 10 man, my guild chooses to two heal this fight so that we have an extra dps to help with blood beasts. It works well for us, and you may want to attempt it if your raids are not having much success.
Friday, January 15, 2010
Grrr! 'Nerf' should be a four letter word...
It doesn't seem so long ago when I was just a noobish, "what do you mean the max level wasn't always 70?", kitty feral druid, who had no idea what a 'healbot' was or how to use it. My first "raid" build consisted of EVERY talent in the resto tree. My UI was exactly the same as it was when I first installed the game out of the box. And, if someone took a screen shot of my first visit to Kara, you could easily recognize me as the silly Tauren in full Gladiator gear.
In other words, I'm by no means a veteran of this game or a card carrying pre-BC player. So forgive me if I'm out of line for saying this, but... "Why the hell does Blizzard want to make this game so damn easy all of a sudden?"
When Naxx came out, we had to bang our heads against it for a while before we were able to clear it in one night. If you wanted gear upgrades, guess what... you had to RAID! You had to raid in whatever you had on and hope that you walked away with a loot drop.
Then there was Ulduar. Running through Ulduar was a little bit easier because of the emblem system. But, the only way to get emblems was to RAID! You could supplement your gear pretty nicely by farming Naxx for emblems, but even in full Naxx, Ulduar was still a challenge for most of us. The only way to get better was to run Ulduar and hope to get far enough to earn a loot drop... or at least enough emblems to buy yourself a gear upgrade.
After that... all hell broke loose. The emblems system turned into easy mode. If you wanted upgrades, you didn't have to worry about banging your head against Trial of the Crusader or even farming Ulduar if you didn't want to. You could simply take a new level 80 toon, farm regular Trial of the Champion and any level 80 instance in the game, and inside of a week you'd be just as geared as those toons who progressed through Ulduar the hard way.
Ok, ok, so you've heard this rant before, and you're probably thinking... "So, the emblem system makes gearing up too easy. Get over it, Beck." I am over it. What bothers me is that even with gear being handed out like fliers on the Las Vegas strip, Blizzard still feels the need to "nerf" new content almost immediately after they release it. What's up with that?
The best part of this game, imo, is going into an instance and having to figure out 1. why you wiped and 2. how to fix it so it doesn't happen again. And, if for some reason you can't figure out a way to down a boss in the first week, you get to farm some emblems, gear up a little, and take another crack at it later. The challenge is what makes this game fun... at least for me.
So why does Blizzard feel the need to take that away from us? Why can't they force us to progress instead of bringing the instance down to our level? Why can't it be the way it used to be? Or, at least the way I imagine it used to be.
In my guild's 10 man ICC last night I heard that god awful word again (nerf) and I wanted to find a Blizzard employee to slap! (Well, not so much wanting to slap as to shake a stern finger at.) Rumor has it that ICC will be getting another nerf next week. So, before my guild even gets a look at Plagueworks (14 days after it came out) they're going to nerf it?
FUBAR.
Healing on the run: Lady Deathwhisper

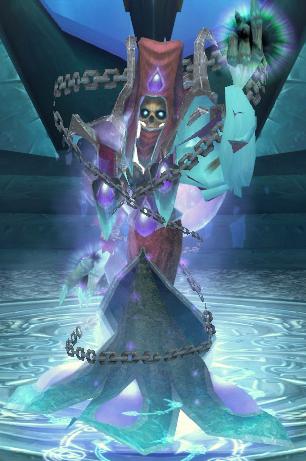
Lady Deathwhisper
Phase 1:
Where to stand - Adds will be entering from the left and right sides of the room, so setting up shop in the middle of the room is a good idea.
What to watch for -
1. Death and Decay! - Lady Deathwhisper will toss this AoE spell at the feet of a random toon throughout the fight. This green rune is a little bit smaller than the circles of death you find in Ulduar: Iron Council, but they're still fairly large and not something you want to take your time moving out of. Death and Decay ticks for roughly 4500 dmg per second. The usual drill applies here... move first, cast second.
2. Adds! - Six adds of two different types will spawn at regular intervals throughout phase 1. One type (cult adherents) will be attacked by melee, the other type (cult fanatics) will be attack by ranged. Shortly after death, both types will reanimate and will have to be killed again. Luckily, picking up, separating, switching to and from these adds is none of the healers' concern. All you have to worry about is not getting too close to them and not gaining aggro when they first spawn or reanimate.
Note: If you'd like to see a list of all their abilities check out mmo-champion.com.
3. Shadow Bolt! - This nasty little spell can hit for over 10k dmg, so be ready to heal some hefty damage spikes.
4. Dominate Mind! (25 man only) - Lady Death will mind control one player, increasing their damage by 200% and healing by 500%. Feel free to CC one of your buddies if you see that their mind has been taken over.
5. Curse of Torpor. - This curse will add 15 seconds to the cooldowns used by anyone afflicted with it. In the grand scheme of things this curse isn't much to worry about, but still, it can (and should) be removed with your remove curse spell whenever possible.
Phase 2:
Where to stand - The middle of the room is still a good place to be as long as there's no Death and Decay under your feet.
What to watch for -
1. Shadow Bolt! - This spell is a whole lot worse in phase 2 than it was in phase 1. Reportedly it can hit for upwards of 40k, so watch out! The good news is that it's a two second cast that can be kicked. As long as your tanks and melee are on the ball, you should never see one of these cast in phase 2.
2. Death and Decay! - Little Miss Death will still cast her DnD during phase 2, so stay on your toes. It's the exact same spell as in phase 1.
3. Dominate Mind! (25 man only) - In phase 2, Deathwhisper can mind control up to three players. The damage and healing bonuses are the same as in phase 1, and CC will be even more important during phase 2.
4. Vengeful Shades! - The boss will run around the room pulling Vengeful shades from the bodies of fallen cultists. These shades will explode if they catch up to their target, so feel free to take a page from Monty Python and "Run away! Run away!"
Summary:
This fight is quite a bit easier than Lord Marrowgar, and not very healer intensive. Stay out of DnD and far away from adds, and you should have no trouble at all healing through this.
Thursday, January 14, 2010
Healing on the run: Lord Marrowgar

Lord Marrowgar
Phase 1:
Where to stand - Position yourself directly behind a melee toon (non-tank of course) so that they can easily turn and save you when you get bone spiked. Marrowgar has a huge hit box, so you should still end up pretty far from the center of the room.
What to watch for -
1. Coldflame! - Anytime you see the word 'flame' in a boss ability, it's pretty much a given that I'm going to tell you not to stand in it. This time, however, I'm taking it one step further... DON'T GET HIT BY IT. Coldflame is a talent that you will see coming... literally. It starts out directly under the boss and moves in a straight line toward it's target. The flame itself is no more than 5 yards wide, so when you see one coming in your direction, simply step to your left or right to avoid it. There's no reason to get hit by it, but even if you do it won't kill you unless you stand in it. SO DON'T STAND IN IT.
2. Bone Spike Graveyard! - Lord Marrowgar will cast a couple of these at regular intervals throughout the fight. The attack itself is a bone spike (hence the name) that comes out from the ground directly under its target and raises that target in the air dealing damage and preventing any action. It can't be avoided and must be dps'd down for the affect to be removed. Anyone who is impaled by this will need a good amount of heals until they are free from the spike. If you happen to be impaled, there's nothing you can do but call out for help in vent. Positioning yourself directly behind a melee toon will make life easier for everyone (and get you free from the spell faster).
3. Saber Lash. - This is Marrowgar's main dps ability and it's the reason your tanks will be stacking during this fight. You'll likely here people reference the bear boss from Zul'Aman when talking about this cleave, and that's because it's the same mechanic. The damage from the attack will be shared by your tanks as long as they stay stacked, so it won't be a problem for you to heal. If, however, your tanks are not stacked, the full force of this cleave will hit one target for huge amounts of damage. So keep your eyes open and be ready to heal big if a tank has to face Saber Lash alone.
Phase 2: Air phase
Where to stand - In this phase you should stand your ground as much as possible. Your raid should know they only need to move if a Coldflame is coming at them.
What to watch for -
1. Coldflame! - Yes, this is the same coldflame he casts in phase 1. However, during phase two Marrowgar will be casting this while mobile, which means they will be coming at you from different directions, criss crossing each other, and coming more often than in phase 1. Still, you will see them coming at you and as always, don't stand in them.
2. Bone Storm. - This ability is basically a whirlwind attack that lasts the duration of phase 2. While spinning and flying around Marrowgar cannot be taunted, so anyone can be hit by bone storm. The good news is that bone storm can be easily healed through, so there's no need to try and run away from it. Stand your ground if the boss comes at you with this attack. You should only have to move when he drops coldflame on you.
3. Kiters. - More dangerous than the Bone Storm attack are the toons who feel compelled to run from it. Running from this whirlwind will usually put a toon out of healing range. So while bone storm is easy to heal through, it can't be survived without any heals at all. Be ready to chase after any running fools.
4. End of phase 2. - Lord Marrowgar will target 4 toons with his whirlwind. After he attacks the 4th toon, he will stop spinning, wipe aggro, and begin phase 1 again. Any aggro wipe makes a fight harder, but when you add that to the fact that Marrowgar can drop aggro at any spot in the room, it makes this transition very dangerous for all in raid. Be mindful of where your tanks are so you don't end up in front of the boss after the phase ends. And do your best not to gain aggro while your tanks work to pick up the boss.
Summary:
This fight is mostly a dps fight. Watch those coldflames and call out right away if you're bone spiked. If your dps is on the ball, raid healing will be very easy, so feel free to help out the tank heals if things are going well.
Wednesday, January 13, 2010
To be. Or not... RP.
So, I figured I'd give role playing a serious go to see how I like it. I haven't yet stepped foot into the realm of RP, but I have enjoyed writting up a back story for my character. Please, let me know what you think (and feel free to point out any gross RP mistakes I may be committing).
Dusk falls on the Scalemane tribe with the sound of crackling fires and the smell of cooking fish. Atop a steep hill, long shadows and large silhouettes dance across bright canvas tents that glow red from the setting sun. From one such tent, two Tauren boys race recklessly down hill toward a glassy lake.
“Slow down…” the younger, much smaller boy yells after his older brother, “… you’ll break it!”
“Nonsense, Beck…” the elder boy replies, “you just can’t keep up.”
Those words were uttered often by Torgra to his younger brother, always with the intent to elicit a response. And Beck, stubborn and proud as they come, always obliged. Instantly Beck’s strides quickened down the hill… and then widened… and then gained momentum too great to control. As Torg slowed to a stop at the glassy lake’s edge, Beck came stumbling, head first, into it.
“You know, you’re going to scare off all the fish.” Torg declared as he began to bait the shiny new fisherman's pole he had carried securely down the hill.
Without a response, Beck sludged back onto the bank refusing to shake off the water he was dripping wet with.
Mere minutes passed before the now dryer young Tauren began poking his brother for a chance to wield the shiny new fisherman's pole. Gradually, pokes grew into grabs, and grabs into lunges, until a tug of war broke out on the lake’s edge. The elder Tauren took joy in jerking his smaller brother back and forth violently to his left and right, though Beck, to his credit, never loosened his grip.
Atop the hill, Torrag Scalemane grew tired of the ruckus his two boys were causing down by the fishing hole. With one echoing grunt he froze them both in their place, then made his way down to them. The brothers held their heads low as their father approached. Beck quickly released his grip on the pole and Torgra silently relinquished it to his father’s outstretched hand. Beck’s head lowered further as Torrag took a knee in front of him.
“You are very young, my son. Trust that the Earthmother would not have given you the heart of a giant had she not intended you to have the body to go with it. Have faith.”
Rising to his feet, Chief Scalemane now stood over his eldest son.
“Torgra, son of Torrag, you may soon have the strength to move mountains. I pray you will one day grow wise enough to know better than to try."
At that, the sun sizzled as it set into the lake’s horizon. With it came the dark of night and the menacing sound of flaming arrows ripping through canvas!
Screams rained down from atop the steep hill as a score of Centaur laid siege to the encampment. Immediately, Chief Scalemane pulled close his two sons.
“Beck, take this pole and swim as far out into the lake as you can. Don’t look back, just swim.”
Unsheathing his sword, he spoke again “Torg, take my sword and stay on my heals. We make our stand at the grand tent.”
Turning back to glare at his tribe's burning camp, Torrag Scalemane spoke for the final time.
“Sons, heed my word.”
A dive in the water did little to dull the volume of his father’s battle shout. Beck, once again headlong into the lake, swam harder and faster than he ever had. In the back of his mind he wondered where this speed had been during the many races he had against his elder brother in this very lake. With each stroke he listened more intently for sounds coming from camp. With each stroke the number of shouts deminished, until there were none. He heard nothing but the sounds of his swimming for many long moments, and dared not disobey his father by looking back. Suddenly...
-Splash-
Something much larger than the little Tauren entered the water behind him. No victory drums had been sounded, no calls from the chief had been heard. Beck was certain a Centaur had come into the lake after him, and fear commanded that his already burning muscles work faster, harder to escape.
Several more moments passed and the noise from behind was quickly closing the gap. The exhausted young Tauren was now fighting more to stay afloat than he was to flee his pursuer. Shorter strokes did less to raise his head above water. Longer pauses sent him further beneath the surface. His pursuer was practically on top of him now, and Beck had no where to go but down.
Mustering all the strength he had left, the youngest Scalemane lifted his head above water to draw in one last breath, then he let the lake's pull take him. No sooner had he submerged than was his pursuer upon him. Beck readied himself for the sting of a spear, but instead felt the grip of a familiar hand on the back of his mane.
Torg lifted Beck's head above water and commaned him to "Swim."
Confused and exhausted, Beck glared up at his brother.
"Torg? How? What happend to father?"
"Swim." the elder Tauren again commanded.
"Torg!?" Beck shouted, again slowly sinking below the surface. "What happ...!"
The lake choked off his words as water filled his lungs. Torg was losing the battle to keep them both affloat. The brothers Scalemane locked gazes for a moment before... Torg let slip his grip.
As he sank deep into the lake, Beck saw his brother swimming away, still holding the sword handed to him by their father. Sinking further, he looked with a smile at his own hand still wrapped around the shiny new fisherman's pole. "Heed my word." he heard his father's voice ring in his head. "Have faith."
On the far shore, Torg looked back to see the fires of his tribe's camp slowly burning themselves out. No more silhouettes could be seen atop the hill. Searching for a sign of his brother, Torg turned his eyes to the once again glassy lake but saw nothing save for his own guilt ridden reflection. "Heed my word." he heard his father's voice ring in his head. And with that, Torg turned to make his way down the long road toward the Barrens.
--------
Moonlight danced as new ripples formed on the surface of the lake. On it's edge, at the base of the hill, a young Tauren sludged onto the bank refusing to shake off the water he is dripping wet with. In his hand, a shiny new fisherman's pole that once belonged to his father.
Subscribe to:
Posts (Atom)